


What do you need?
- A camera with a custom white balance setting (dSLR cameras and some point and shoots, check your manual if you aren't sure)
- A gray card or a sheet of white or gray paper
- To shoot in a mode other than automatic. Most cameras will only let you use custom white balance if you are in manual, aperture priority, or shutter speed priority mode.
When you set a custom white balance with your camera you are defining what white or gray look like in your current lighting situation. This is particularly important when you are photographing a quilt because you want the colors of your quilt to be accurately portrayed.
This is a photo I took one morning of some fabric hanging on a branch in my backyard. The photo is SOOC (straight out of camera) meaning it is completely unedited.

The photo is okay, but notice that the coloring is a little blue.

This is a photo taken with the same settings and is also SOOC, the only difference is this was taken after I set a custom white balance.
I am not going to go into technical detail about how exactly to set custom white balance since it varies depending on your type of camera, but I will give you a basic overview and will provide some links at the bottom of the post for camera-specific tutorials. If you don't see your camera model listed, let me know in the comments and I will track down the details and add it to the list.
I am pretty sure that all dSLRs have this feature, and some of the fancier point and shoot cameras have it too. I personally use and adore my Nikon d7000.
I also use a gray card. You can also use a sheet of white or gray paper, though it might not be as accurate.
1. Set the exposure on your camera. I shoot in manual mode so that means adjusting the ISO, aperture, and shutter speed until I am happy with the exposure.
2. Set the white balance on your camera to custom. On my camera that means pushing the white balance button and turning the dial to the custom setting. On some cameras you will actually make this switch after you take a photo, so check your manual.
 3. Fill the frame of your camera with the gray card like the photo on the left.
4. Take a photo. On my camera this doesn't actually save a picture of the gray card, it just makes a clicking noise like I'm taking a photo and automatically sets the white balance. Some cameras have you take an actual photo of the gray card and then use that photo to define white balance in the menu.
That's it. Once your white balance is set you can keep taking photos as long as your lighting doesn't change. If the sun goes behind the cloud or you move to a different location you will need to reset the white balance, but once you have done it a few times it only takes a few seconds.
Of course you won't always have a gray card with you so you can adjust white balance on your computer or use one of the white balance presets on your camera. Notice how close the "custom" and "cloudy" photos look. Using custom white balance will take the guess work out of picking a white balance and is especially handy when the lighting is really weird.

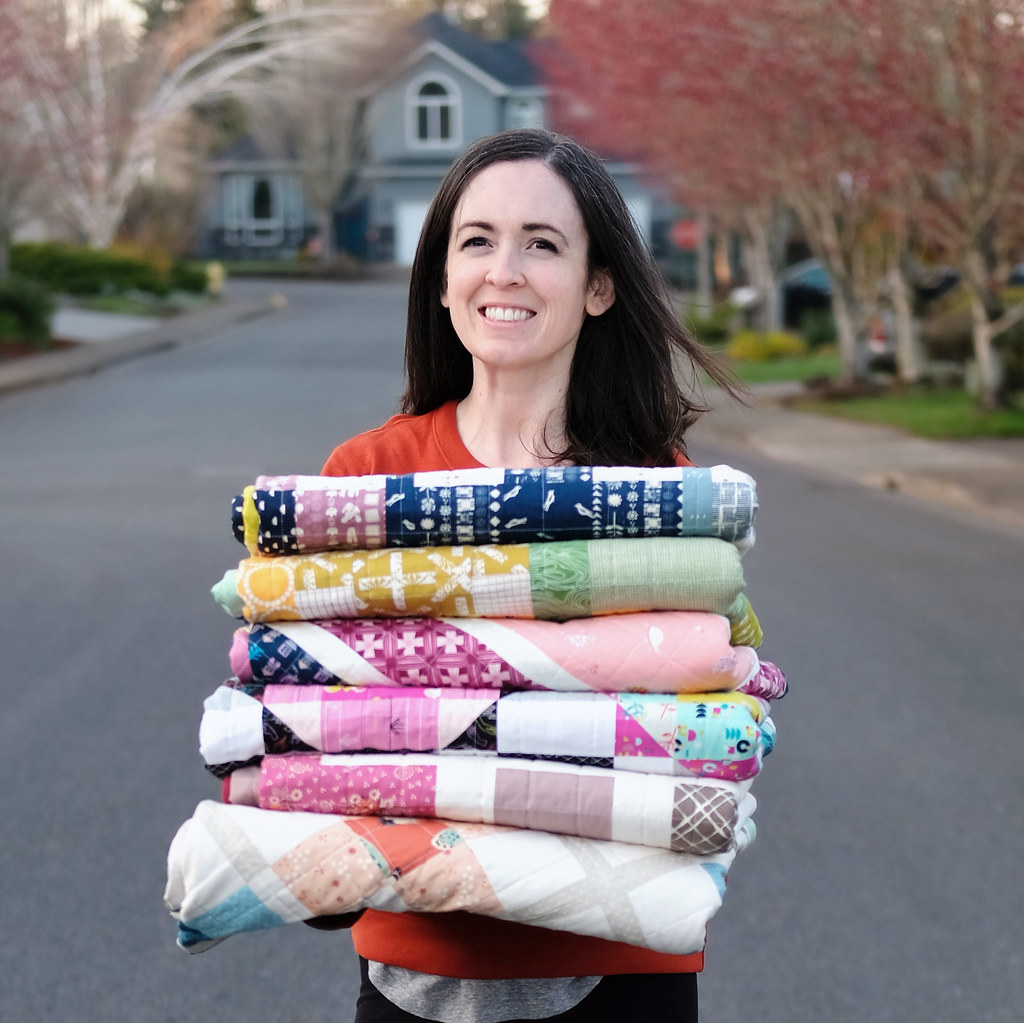
And custom white balance doesn't just take better photos of quilts, it takes better photos of people too :)
 |
| The photo on the left is SOOC with auto white balance. The photo on the right was taken with custom white balance with minor edits to brightness and sharpness in Lightroom. These photos were taken at sunset with the sun in the background. |
If you don't see your exact model listed, let me know and I will try to track down a tutorial.


Awesome tutorial, and YAY, you listed a link for a tute for my particular camera Nikon D3100! Ok, I have a quiet weekend coming up, I am really going to try this out and improve my photos!
ReplyDeleteThis is great! Thx. I'm going to try it this weekend.
ReplyDeleteI need to do this. I get stuck using auto all the time because it's faster and simpler...but the results aren't as good.
ReplyDeleteI'll have to see if my point and shoot can do this. I always have the hardest time getting the white balance right in pictures
ReplyDeletePhotos of my quilts are my real weak spot for sure! I've been slooooowly getting better but have a long way to go still. This is very helpful, thanks!
ReplyDeleteHm, I've been meaning to learn this. And looks like I have! Thank you!
ReplyDeleteNow to track down a gray card thingy.
Thank you for this!! I knew I could do this, but had no idea it was really that easy...will definitely be trying this out soon!
ReplyDeleteWhat if I am using just a plain nikon coolpix. I don't think I can really mess with this can I?
ReplyDeleteI just learned a lot about my camera. Thank you.
ReplyDeleteGreat tutorial thanks.
ReplyDeleteThank you for this simple but much needed tutorial! I hope you plan on doing more of these! Much appreciated!
ReplyDeleteThanks for the helpful tutorial!
ReplyDeleteIs this the same way to use with Canon Rebel XT?
ReplyDeleteThere is a similar way to do this in the Canon Rebel, just check your manual and it should have instructions.
Delete