


I have spent the last few weeks trying out fabrics, tricks, and methods and I am excited to share my findings with you. Even after making a whole bunch of these I am no expert, so if you have your own tips or tricks to share I would love if you could share them in the comments.
Choosing Fabric
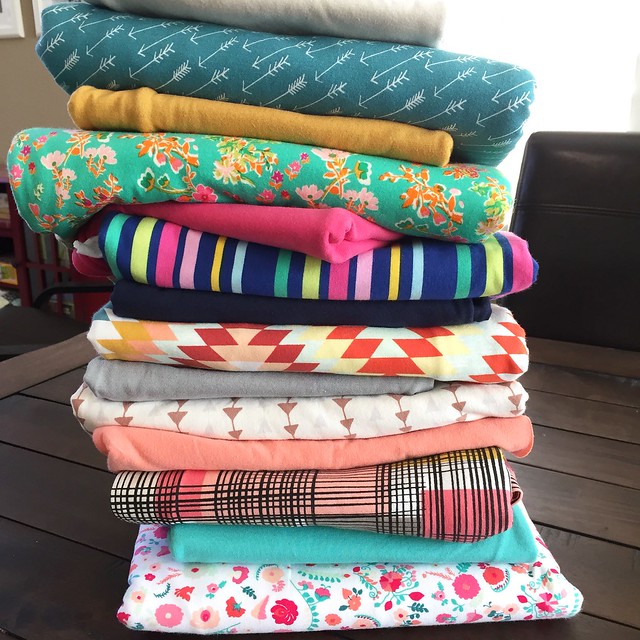
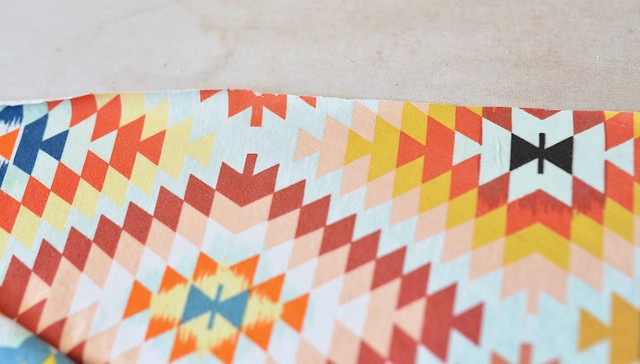
There are several different types of knit fabrics, you can read more about them in this very informative post, but my personal favorite for this type of blanket is jersey knit. It makes you feel like you are being wrapped up in the world's most comfortable t-shirt. Knit fabrics can be a little trickier to find than quilting cotton, but FabricCadabra, Fabricworm, and Fat Quarter Shop both carry a selection.
Prewashing
Should you prewash knit fabric? Yes. The fabric will shrink a little. I washed and dried mine with my normal laundry since that is how the blankets will be washed. If you pull the fabric out of the dryer as soon as it is dry the fabric will be nice and pretty much wrinkle-free.
Preparing to cut the fabric
One downside of jersey knit is that the edges will curl up A LOT.
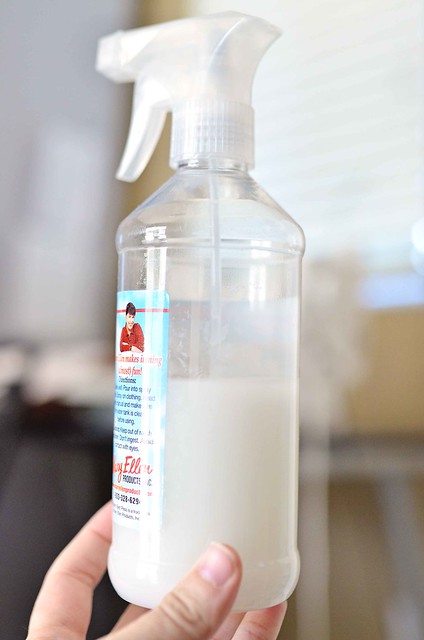
If you are going to just be trimming up the edges, I highly recommend starching the fabric first. And not just a little bit of starch, you want to spritz it thoroughly and then make sure to completely dry the fabric with the iron or the edges will curl back. I really dislike the smell of spray starch and I didn't really want to invest in an alternative, so I found this great recipe for making your own starch. It worked wonderfully.
If you have starched 3-4 inches from the edge, your new cut edge should still be nice and starchy.
Now if you are going to be making a cut from somewhere more in the middle of the fabric where you don't have to worry about the edge, save the starching for after you cut your fabric. It takes a little bit of time and effort, but starching makes the entire process much easier.
Choosing your blanket size
Since these Art Gallery knits are 58"-60" wide, you have some options for choosing your blanket size. These are the options I chose, though you could go with any size.
- 36" x 45" - This is a great size for carrying in your diaper bag or using in the car seat or stroller. You can get away with buying 1 yard of fabric and will have a little leftover (I will show you how I used my leftovers in part 2).
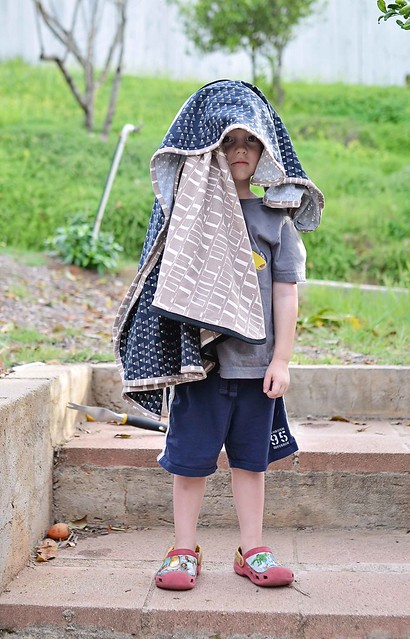
- 54" x 58" - This uses a 1 1/2 yard cut and is great for kids or adults. It takes advantage of the full width of the fabric. My husband thinks I am crazy, but I have been sleeping with one. It is seriously so soft.
Cutting the fabric
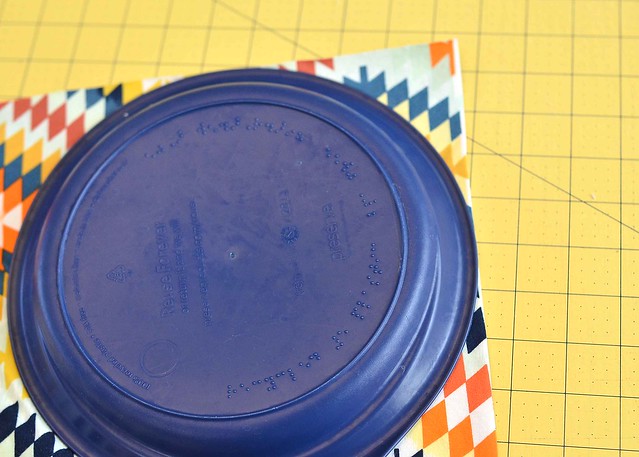
If you have successfully starched your fabric, cutting should be pretty similar to cutting quilting cotton. I folded mine in half, selvage to selvage, and then cut to my desired size. Once I had my fabric cut I used a dinner plate to cut a curved edge.
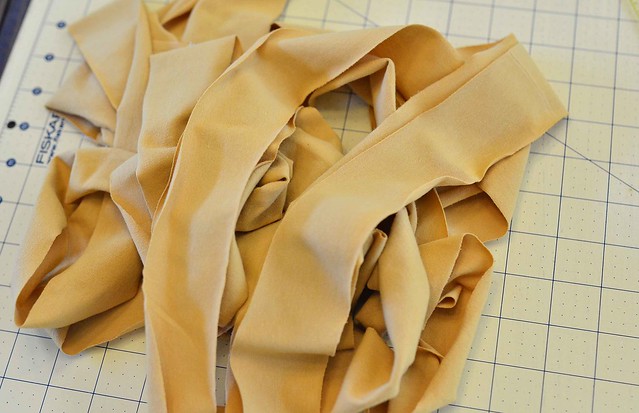
Cutting and making the binding
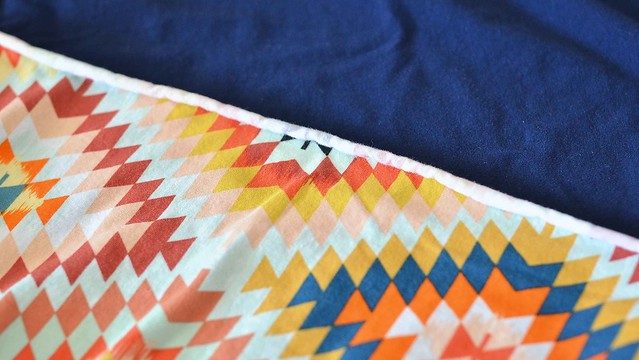
I was so pleased to see that Art Gallery has recently released solid jersey knit fabrics. Since jersey options are more limited than quilting cotton, finding a coordinating binding is a little more challenging and their solid knits coordinate with almost all of their prints. Of course you can also use prints for the binding.
Since jersey fabric is already stretchy, you don't have to cut along the bias. Yay! Starch the edges of the fabric and cut as many 2" strips as you need. Once you have your strips cut, it's time to join the ends just like you would with quilt binding.
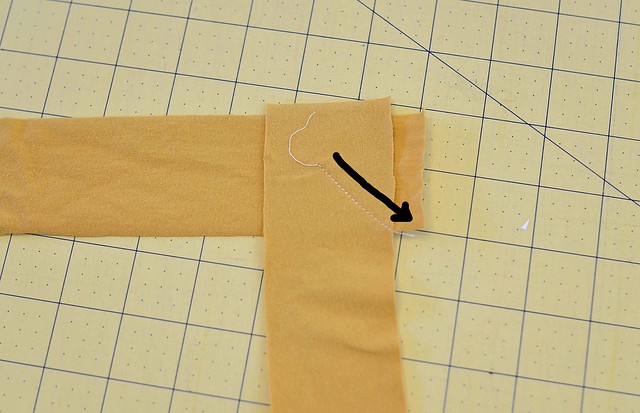
I found that my machine liked to eat the fabric when sewing together binding strips no matter what I did, so I like to start about half way across the diagonal and sew to the edge.
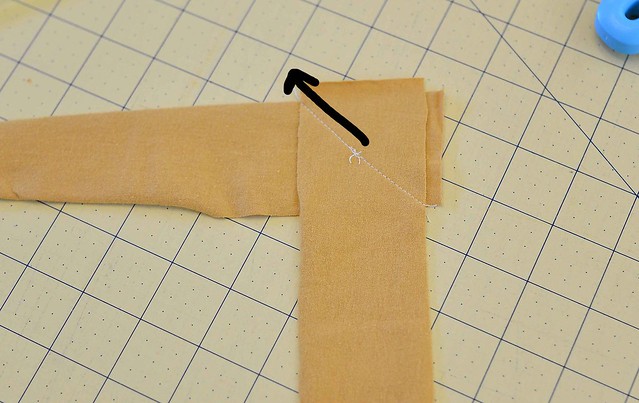
And then flip over to finish sewing along the diagonal.
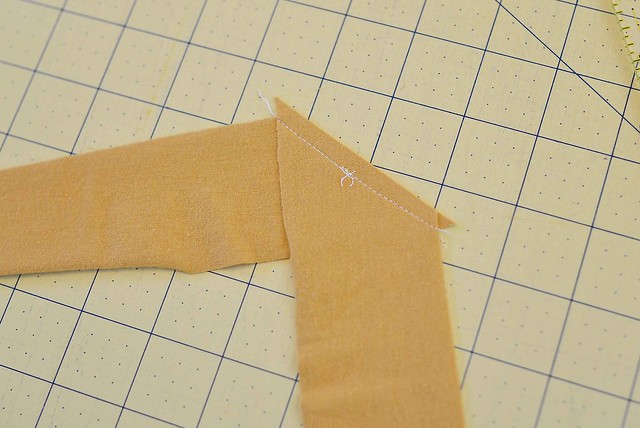
Trim the seam allowance down to 1/4" and press the seam open.
While you can try to press the strips to turn them into binding like you would with quilting cotton, I found this to be a waste of time because the ironed fold was barely noticeable by the time I actually got to sewing it on the blanket.
Instead I just pressed and lightly starched the binding flat so that the edges weren't rolled up.
I hope you found this information helpful. These blankets are my new favorite thing to make and I am looking forward to having them as quick-ish baby shower gift option. Part 2 of the tutorial will be posted later this week or early next week.
Some of the fabrics in this post were provided by Art Gallery Fabrics at my request. I have done my best to portray my honest opinions.

You're so right! Jersey Knits are so soft. I am going to use your tips and make a couple. I've tried to make one and got frustrated lol but your ideas make it sound a lot easier. I'll look forward to the rest of your tutorial next week and try making one again! Thanks for sharing and have a wonderful day <3
ReplyDeleteThe picture shows a two sided blanket. Will putting two different knit pieces together be in the second part of the tutorial?
ReplyDeleteI've always admired this type of blanket but was hesitant to try it. Thanks for the tutorial.
ReplyDeleteThese are so cute! I've read your tutorial in the past, but paying more attention now as I'm getting ready to make some :) Do you remember how much fabric you needed for the binding? I have to order everything online, but I'm guessing 1/2 yd would be enough?
ReplyDeleteNice, Thanks for posting
ReplyDeletebest baby stroller
Thanks for sharing your experience, Stretch Knit Fabric is according to today’s apparel industry and demand and you must have to see this.
ReplyDeleteHi! This is my first visit to your blog! We are a team of volunteers and new initiatives in the same niche. Blog gave us useful information to work. You have done an amazing job! cotton blanket
ReplyDeleteTake advantage of everyday wholesale pricing, discounts and regular specials from your online wholesaler of janitorial and cleaning products. tall kitchen bags
ReplyDelete