


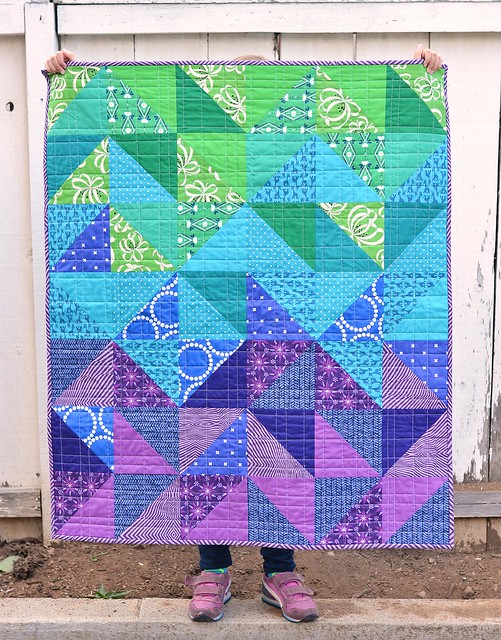
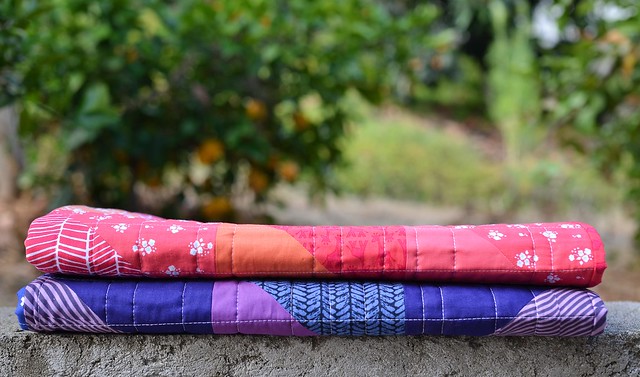
Cut (42) 6.75" squares for each quilt. I used different shades of three different colors, but yours doesn't have to be rainbow-y. It could be scrappy or a single color or whatever you want.
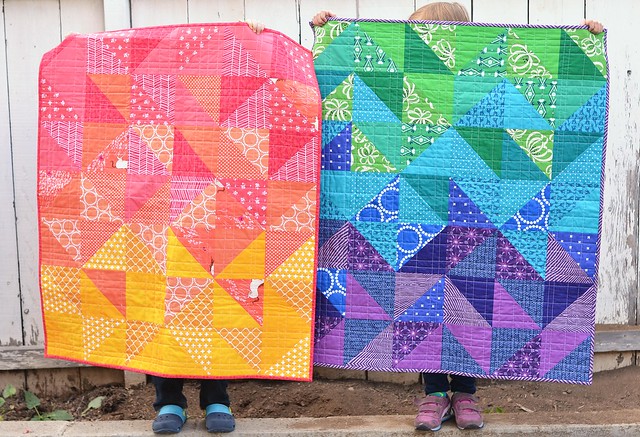
Pair the squares together to make half square triangles. Trim the HSTs down to 6.25" and sew together the quilt top so that it is 6 blocks x 7 blocks.

When I was finished with the quilt tops I was a little stumped about what to use for backing. I wanted to use the same print in different color ways and I was convinced that I wouldn't find anything out there that matched both of my quilt tops. But I checked my stash and was delighted to find out that my fabric hoarding had paid off: I had enough of this Alison Glass print in orange and in blue to back the quilts. Yay for having too much fabric!
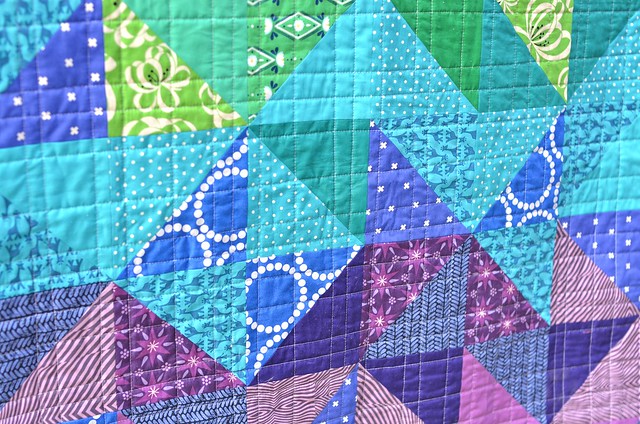
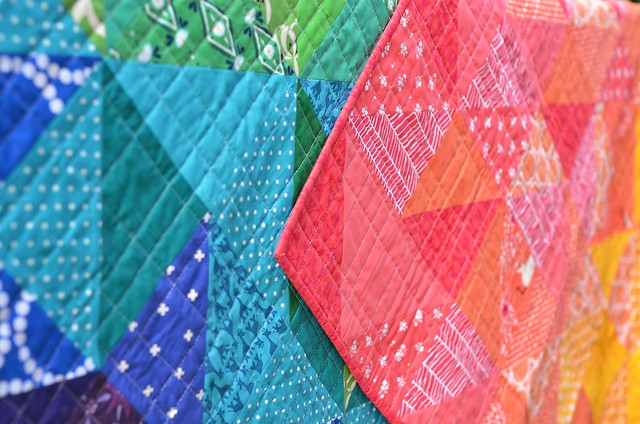
If you want a quick way to quilt a project, I highly recommend the "organic grid." It is one of my favorites. You don't have to mark any lines, just start sewing without making an effort to keep the lines perfectly straight. I have tried making my lines intentionally crooked, but it looks a little funny and I am pretty good at making my lines a little crooked without trying. This method gives the quilt a great feel and it is so fast.
My nieces are still in the hospital, but are just on oxygen while they get fattened up a little bit.
So I just need to get these in the mail so they are waiting for those sweet baby girls when they come home.
Finished size: 35" x 40"
Backing: Alison Glass Sunprint
Batting: Quilter's Dream Cotton Select

Glad to hear the twins are doing okay. I hope your sister is doing well also. The quilts look great! I love those Alison Glass prints for the backing.
ReplyDeleteHa! I'm pretty hood at making crooked lines without trying, too! Whaddya know! I love that your rainbows are a little mushy, without those hard lines between each color! Wish I had some twin nieces ;)
ReplyDeleteLove both the colour choices - very nice :)
ReplyDelete♥ ♥ ♥ They're fantastic and will be loved for a long time!
ReplyDeleteBoth quilts are stunning! I love the idea of matching backings!
ReplyDeletecan picture 2 very happy faces when they see these quilts, liking the idea of the random crooked lines I should be a genius at that and will certainly have a go
ReplyDeleteLove your quilts, its beautyful and great Work :-)
ReplyDeleteHave a lovely day!
Maria from DK
I love both of these!!
ReplyDeleteWell done
Thank you so much for the quickie instructions for these quilts. Love both of the color ways. I am wondering if Frivols could be used to make the squares~wouldn't take much trimming.
ReplyDeleteOMG!! So cute!! love the colors, and the shoes :-) lucky twins.
ReplyDeleteLOVE these! Can I share the photo with both quilts on my fb page?
ReplyDeleteYour sister will get so many compliments when she has these together with the babies, they are so cute with such wonderful colors!
ReplyDeleteThese are lovely! Especially the use of colour and randomness. I'm thinking of making a HST quilt in blues and greens, either batiks or Kaffe Fassett stripes, for a friend of mine, so this came up when prowling Pinterest. My friend's an adult, so the colours and scale will be different, but I love making bright baby quilts as well. It's also so nice to see baby quilts that have strong colours and aren't colour-coded by gender.
ReplyDelete