


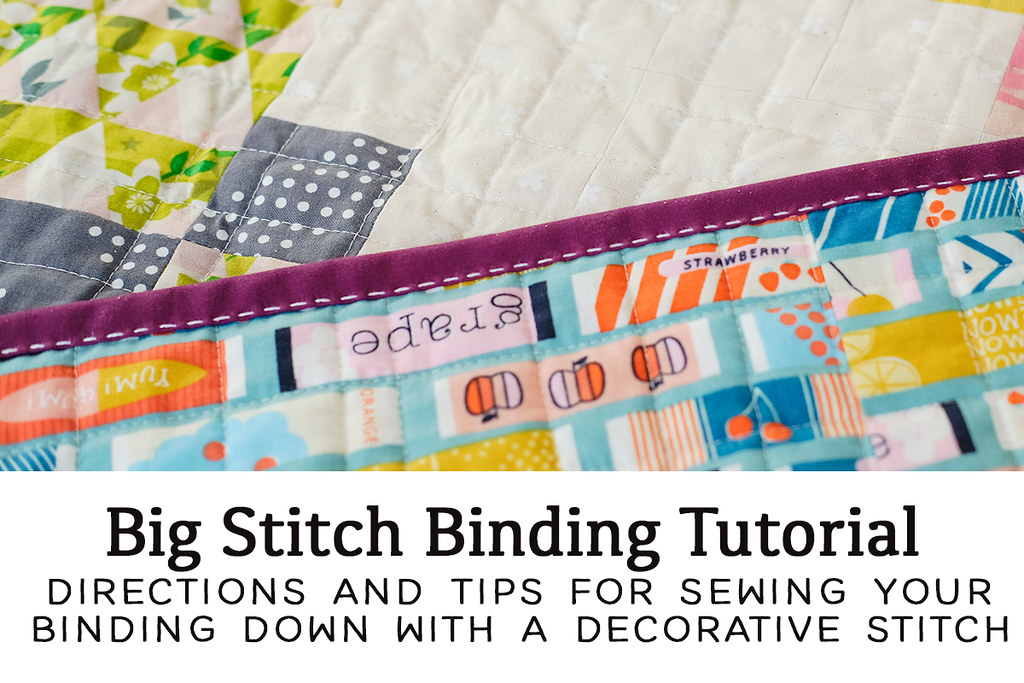
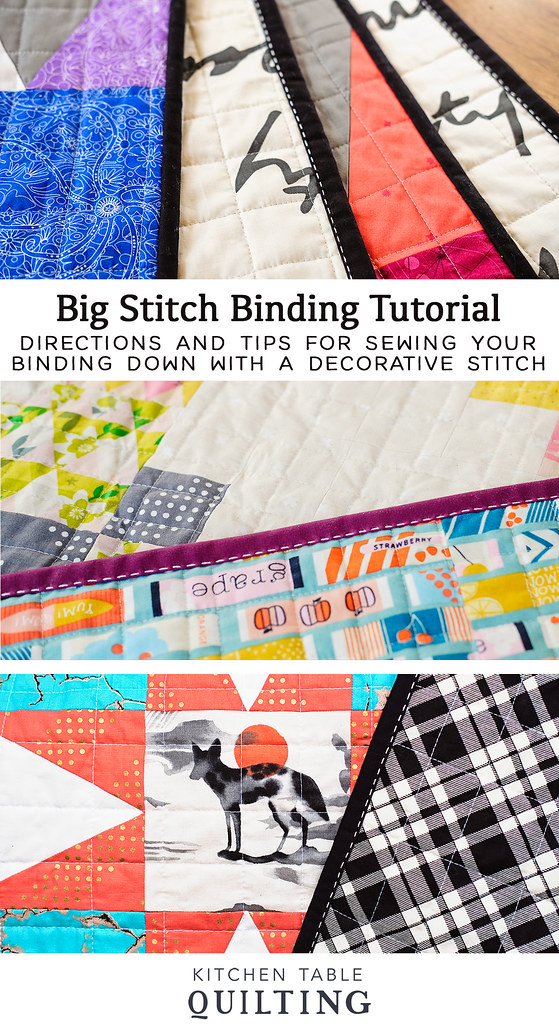
One issue that I wanted to address was how I could make my bindings more durable. I do not enjoy sewing the binding on by machine. It is durable, but I enjoy hand sewing the binding and I didn't want to give that up. But I was having problems with the stitching on my binding breaking occasionally, especially when my kids tugged on them. So when I made this quilt last year, I decided to try "hand quilting" the binding.
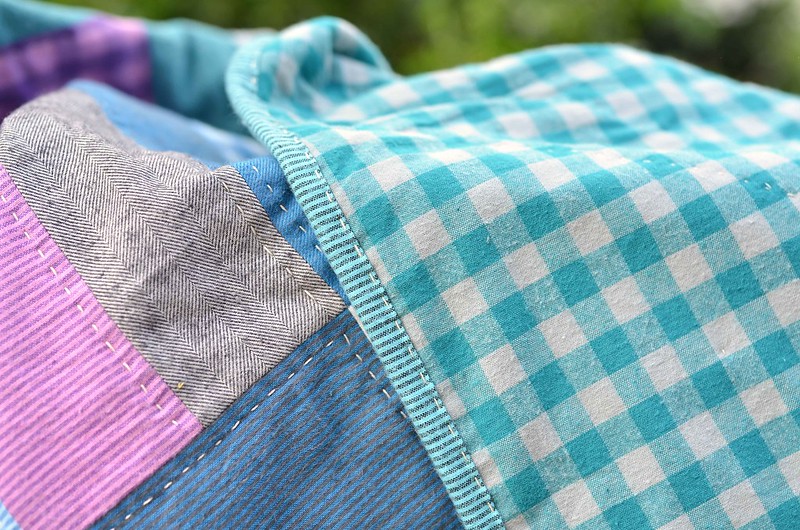
This quilt is super soft because it was made with woven fabrics and has become a favorite with my kids so it has been washed A LOT. The binding has held up beautifully. The above photo was taken when I made the quilt and the photo below was taken his morning. It's not the prettiest stitching that has ever been done, but I like what it adds to the quilt.
Since I made this quilt, I have slowly started binding all of my quilts this way.
Supplies:
- Perle Cotton (size 8) or a thick thread like Aurifil Floss (this is thicker and a little trickier to work with but gives a really pretty, rustic finish)
- Embroidery needle - I use all of these sizes depending on the exact thread that I am using
- Thimble
- Small, sharp scissors - I like these
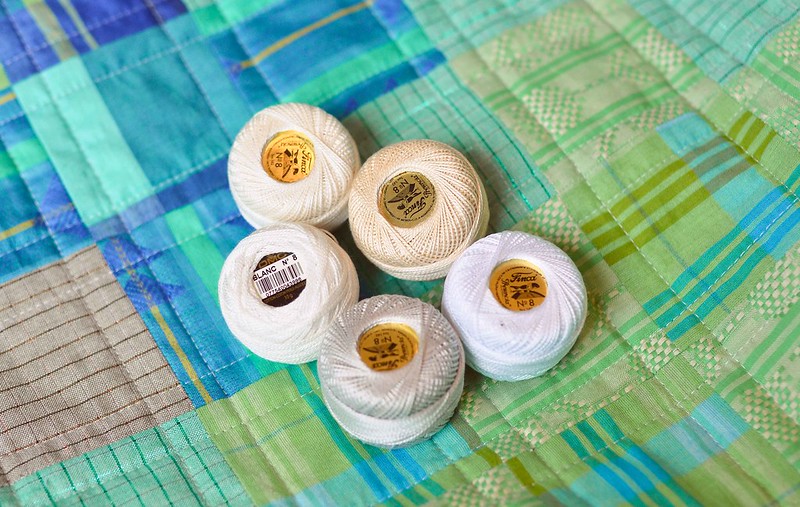
There are several different types of Perle cotton available. I have used Valdani, DMC, and Presencia and have liked them all. You could also use a heavier weight thread, like Aurifil floss, Aurifil 12wt, or a few strands of embroidery thread.
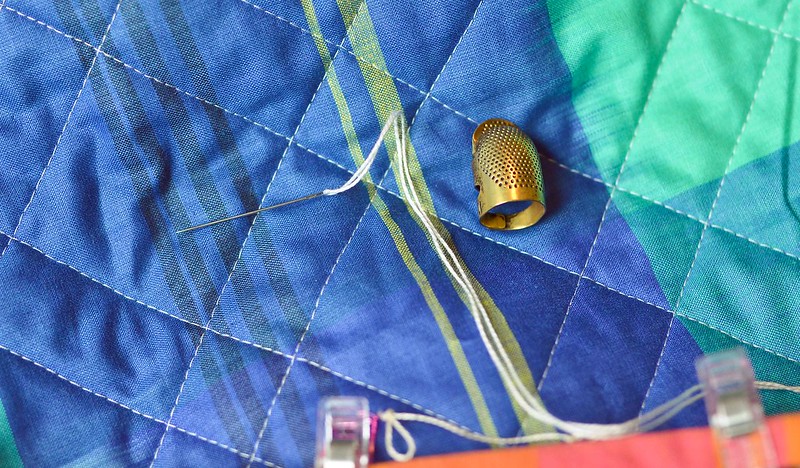
You will also need a needle, embroidery or crewel work well. The main thing is that the eye of the needle is large enough to thread the thick Perle cotton but not so large that it is hard to pull the needle through all of the layers. You will also need a thimble to push the needle. A thimble will save your finger as you rock the needle through the fabric.
This is not exactly related to big stitch binding, but there are a few things that I like to do to my binding.
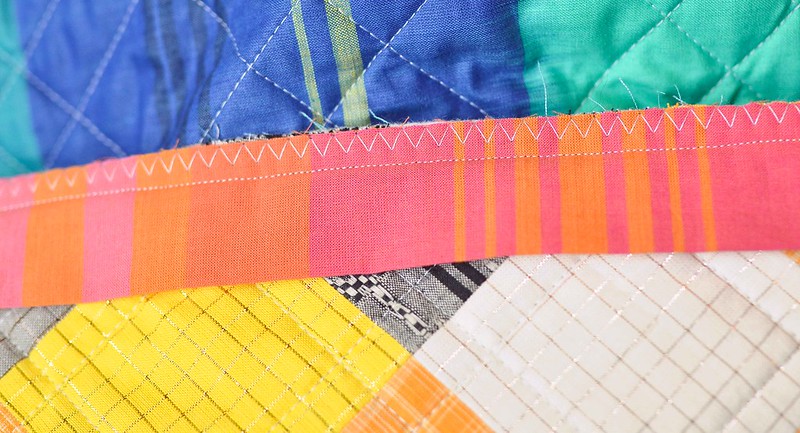
- Zig zag stitch the raw edges. I think I heard about this from Heather a while back, but it gives the quilt a nice, crisp edge and I think it helps keep things together. It only takes a few minutes and is well worth it.
- Press the binding toward the raw edge. This is super quick and it makes hand sewing the binding much easier.
- Make the binding extra wide. How thick do you cut your binding strips? When I first started quilting, I cut mine 2.25". Gradually I moved to 2.5", now I do 2.75" or 3". It is much easier to get a mitered corner with a wider binding and I love the feel. I use a seam allowance that is wider than 1/4" and the size of the seam allowance varies on the binding material, batting etc. As you can see in the photo below, it does clip the corners of my blocks closest to the edge, but I have decided that it does not bother me one bit.
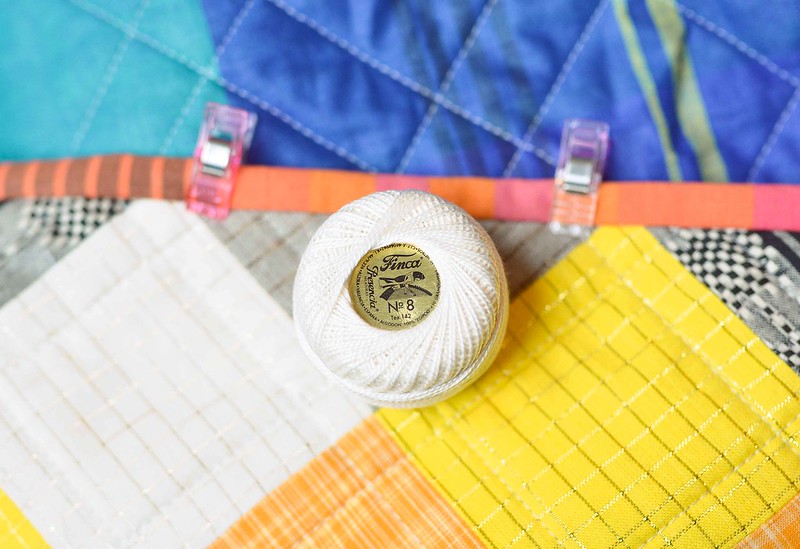
Secure your binding with clips and choose a thread color. I like to use a thread that contrasts with my binding, but matches the quilt.
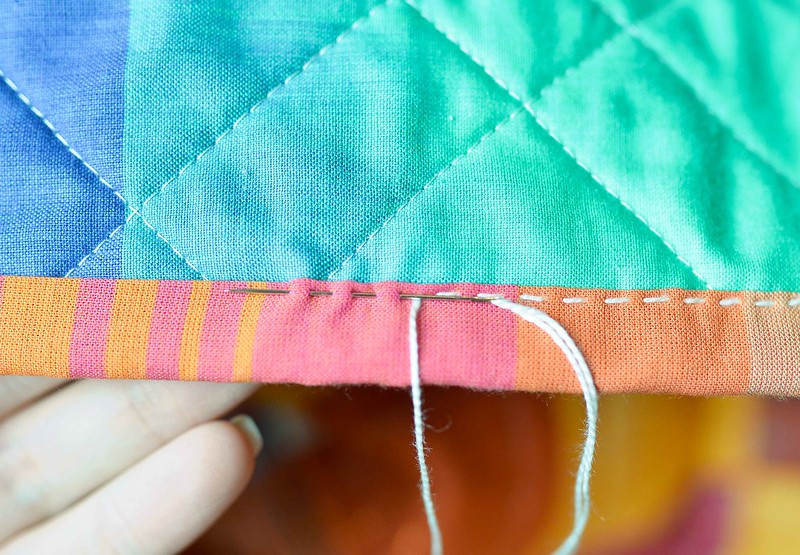
Start sewing! If you have hand quilted before, this will feel really familiar. You can rock the needle just with hand quilting, but the needle doesn't go all of the way through the quilt. I can usually load 3 stitches on my needle before pulling it through. If you haven't hand quilted before, this tutorial by Sarah Fielke is excellent.
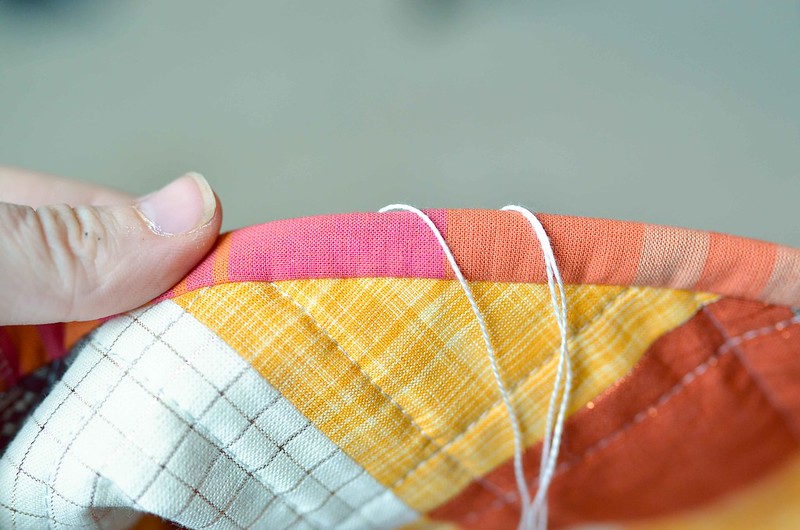
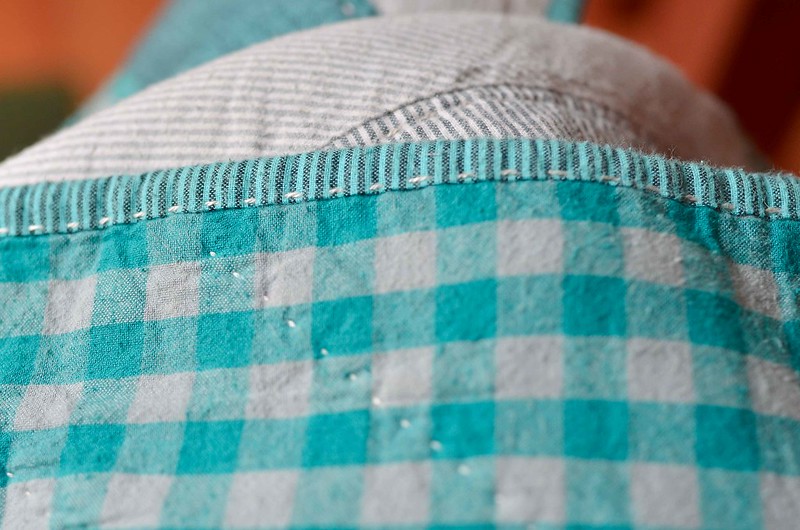
Here is a photo of the reverse side. Because you are sewing through so many layers, it actually takes quite a bit of effort to pull it through to the other side. Sewing through the binding and backing takes just the right amount of effort. Keep going until you have finished quilt. I miter the corners in exactly the same way as when I was trying to hide my stitches, so that hasn't changed.
I hope that helps anyone who was interested. If you have any questions, post them in the comments section and I will do my best to answer!

Have you tried knotting your threads at intervals so that if thread breaks in one place all of threading will not come loose?
ReplyDeleteWhen I was garment making and hand hemmed my garments (b4 I got my blind hemmer), I would knot my threads intermitingly to keep the hem from a total undue because of a broken thread.
I'm not sure how it will look in quilting but if it's a house quilt it should be fine.
That is a great idea, that didn't occur to me. I haven't had an issue with these thicker threads breaking, they are pretty durable.
DeleteI always use 3" binding strips and make wide bindings. To avoid cutting off the points I Square the quilt 1/4" past the edge of the quilt top. When I sew the binding to the front I lay it along the edge of the quilt top and sew 1/2" from the batting edge (1/4" from the top edge). Now you have a nice fat binding but you don't lose any of your top.
ReplyDeleteExcellent point, I will have to try it.
DeleteHi Erica! Your quilt and quilting look so beautiful! I hand quilt and the bindings I sew by machine. But, with my first quilt I did the binding like this (with straight corners because didn't know better then). I never made it again that way because thought 'it's not correct way'. We should think more free and not to stick in the same old things and thoughts. You insipired me to do this again! x Teje
ReplyDeletewww.nerospostbox.wordpress.com
Agreed, there is more than one way to do things!
DeleteWow, I just watched the video by Sara Fielke- it was great. I bigstitched a heavily pieced quilt using #5 perle cotton. I wanted big, bold stitching but I was afraid that I would rip my quilt with the big needle. It was really hard but the results were awesome. I attended a demo of big stitch quilting and the woman gave me " finger Cots" to wear. They helped pull the needle through the fabric. It was amazing how much it helped. Thanks for sharing. I may just try a binding this way.
ReplyDeleteI haven't had trouble pulling the thread through for the binding, I think that by not pulling it all the way through the quilt it is much easier.
DeleteThis is lovely. Have you considered folding the binding to the front instead so your stitches show on the 'front'. Whatever, this is a nice consideration. Thanks for sharing.
ReplyDeleteI had not considered that, but now I will need to ;)
DeleteWhat size needle do you use?
ReplyDeleteI usually buy a multi pack of embroidery needle and I think the ones I end up using most are size 4 or 5.
DeleteThanks for this!! I love the look of the hand stitching on the binding on the back!
ReplyDeleteThank you for the great tutorial! It's the little details that make a big difference in a quilt. I love it!
ReplyDeleteDo you zig zap the edge BEFORE you stitch down the binding, or after? Thank you!
ReplyDeleteI can only find tutorials on machine binding. I don't have a machine and would like to learn how to attach binding. At the moment I fold the backing fabric to the front and sew. Please would you do a post on tips and strategies for binding a quilt by hand? It would be much appreciated.
ReplyDeleteThis comment has been removed by the author.
ReplyDeleteJust to be clear . . . you do NOT pull your stitches all the through the other side which is why we don't see them, right? You're securing the binding just by going inside the layers. Am I correct? I love the look and I really like Debbie's idea of seeing your stitching on the front :)
ReplyDeleteYes, that is correct! I try to make sure I get the batting, but not the quilt top. I originally tried sewing through all of the layers but it was very difficult to pull the needle through.
DeleteI would like to say that this blog really convinced me to do it! Thanks, very good post. I think this is an informative post and it is very useful and knowledgeable. therefore, I would like to thank you for the efforts you have made in writing this article.
ReplyDeletenescafe
When you have finished stitching on the binding how do you hide and secure the thread ends?
ReplyDeleteI knot it and bury it in the fabric. If you have never done this before, look it up on YouTube and there should be several tutorials!
DeleteI've been admiring your hand stitched binding for awhile now. I think I'm going to have to try it soon. Thanks for the very clear tutorial.
ReplyDeleteI've started making smaller quilts, wall hanging size and even down to 6". I think your hand sewing with the big stitches would be perfect for finishing my projects. And I like Debbie's idea to show it on the front. Thanks!
ReplyDeleteThis comment has been removed by the author.
ReplyDeleteI used big stitches to finish attaching the binding on the quilt I made for my SIL's wedding, thanks to this post. It turned out great! I think the perle cotton I used was #5. This style complemented the big stitch quilting I did on the whole thing. Here are some photos: https://twitter.com/zigged/status/1046784578877353984
ReplyDeleteCan we use a regular sewing needle if we don't have embroidery needles?
ReplyDeleteI haven't tried it, but you could give it a try!
DeleteSo glad I found your blog and landed in the big stitch basting! I not only love the look but it allows me to do just a little bit of hand stitching on my quilts! Thanks for a great idea and the tutorial
ReplyDeleteYour stitches are so neat and evenly spaced - it looks beautiful! Definitely adds even more of a 'home made' element to the quilt and it's great it makes it sturdier too.
ReplyDeleteGood morning Erica, your quilt is beautifuland I loved your idea. When you say zigzag raw edge what edge you referred to? Thank you for sharing your thoughts and ideas.
ReplyDeleteAfter I sew the binding onto the front of the quilt with my machine, I do a zig zag stitch along the raw edge of the quilt. This stitches together the quilt backing/batting/top and the raw edge of the binding.
DeleteJust to be clear . . . you do NOT pull your stitches all the through the other side which is why we don't see them, right? You're securing the binding just by going inside the layers. Am I correct? I love the look and I really like Debbie's idea of seeing your stitching on the front :)
ReplyDeleteThat is correct! I did try pulling it through to the front when I first tried this, but it is very hard on your hands - just too many layers!
Delete