


Meet the February Block. Just like last month's block, there are instructions for 24" and 36" versions and a couple of examples on how to use the blocks to make your own Giant Block quilt.
24" Block Quilt Idea
This quilt finishes at 68" x 68." To make this quilt, you will need to make (5) of the 24" blocks.
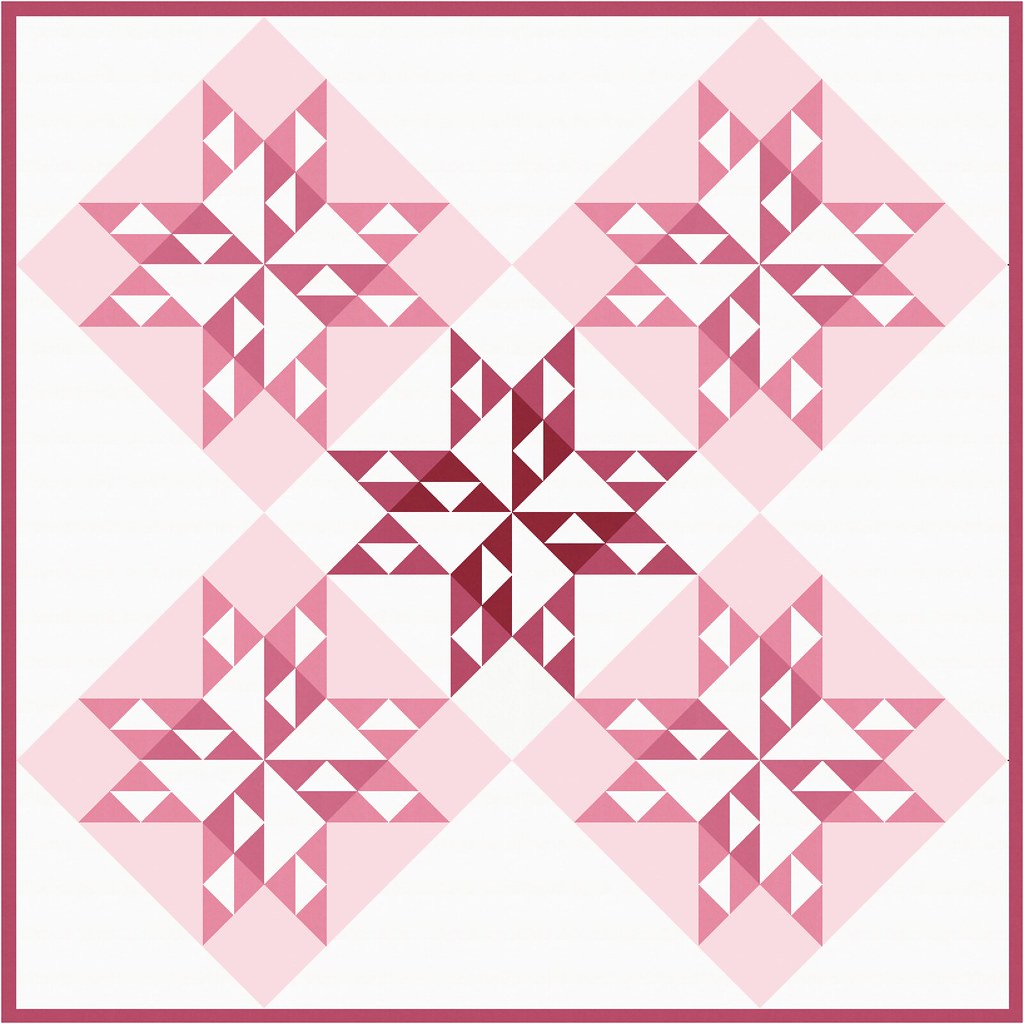
Corner triangles: Cut (2) 18" background fabric squares. Cut along one diagonal to make (4) corner triangles.
Side triangles: Cut (1) 35.25" background fabric square. Cut along both diagonals (in an X shape) to make (4) side triangles.Piece together the quilt with the blocks on-point. If you are unfamiliar with on-point quilts, check out this great tutorial.
36" Block Quilt Idea
This quilt finishes at 45" x 45" and is super quick to put together. Note: the block below shows the binding to help outline the edge of the quilt
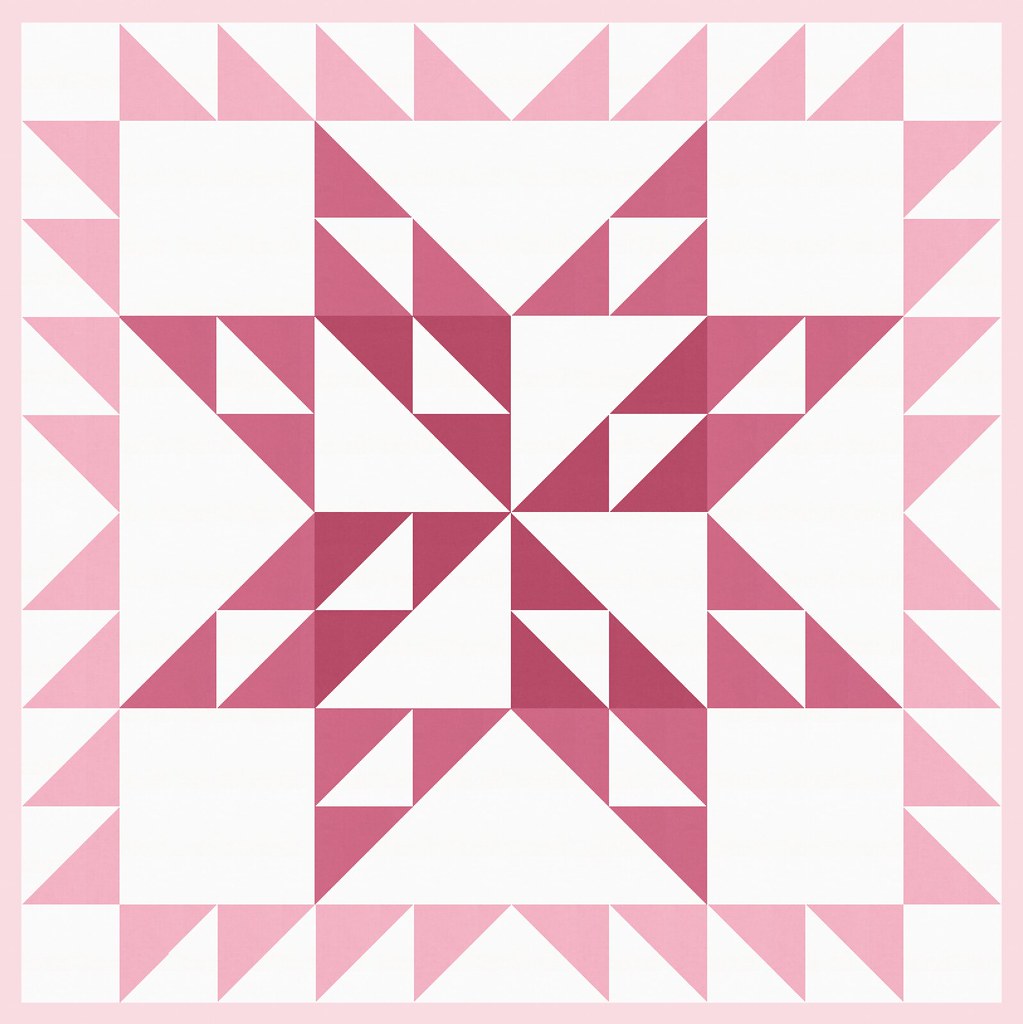
You will need to make (1) of the 36" blocks and (32) 4.5" x 4.5" HSTs. You will also need (4) 4.5" x 4.5" squares of the background fabric for the corners.
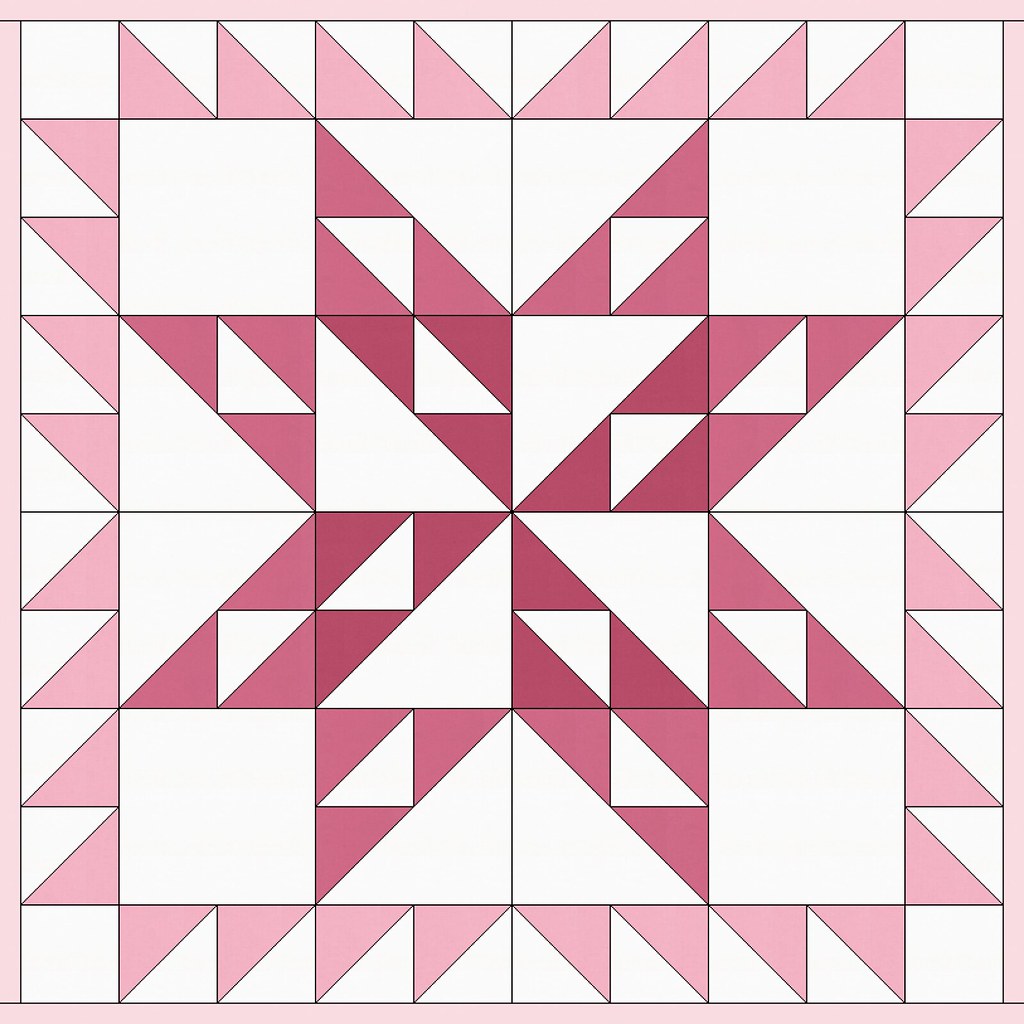
After you piece together your 36" block, add a border of HSTs.
I hope you have enjoyed the tutorial! If you make a block or a quilt using these instructions, I would love to see a photo! You can use the hashtag #GiantBlockTutorialSeries on Instagram or send me a photo or a link to your project. I will be pinning all of the projects to the Giant Block Tutorial Series Pinterest Board.
You can download a printable PDF of all of the Giant Block Tutorials (for free) in my shop.


Urg...i would really really love to print this or save as pdf...do you have that option? I tend to save mine for later assembly and I love these blocks.
ReplyDeleteYes, there is a link to the PDF at the end of the post!
DeleteI made a goal to finish 3 WIP’s before starting anything new and you are making that very difficult for me! 😂😂😂
ReplyDeleteSorry! Ok, maybe not sorry! 😉
DeleteI think I'm going to mash up the on point and the HST boarder. But first I need to decide on colors!
ReplyDeleteI absolutely LOVE this series of tutorials, Erika! You do a fabulous job of making everything so easy and the pictures are awesome. I'm going to use this block to make a Quilt of Valor (QOV) and would like to share it with members of the QOV group that I belong to in Kersey, Colorado. I'm going to make a copy for each member of our group and promise to include the link to your site. I won't print this for a few days so please let me know if this is a problem. Thanks for all you do for other quilters like me by providing such great resources and sharing your obvious expertise!!! ☺☺☺
ReplyDeleteThank you for your sweet comment. I would love for you to use this pattern for Quilts if Avalon and you are welcome to share copies with others!
DeleteI love these large block patterns and want to thank you for sharing them.
ReplyDeleteYour work is time-consuming but you know that it is well done!
ReplyDeleteMissy
unable to download
ReplyDeleteThanks for this pattern...its amazing.
ReplyDeleteSee: tdeecalculator.io
nice
ReplyDelete