


We are nearing the end of week 1 of the Carly Quiltalong and we are almost ready to start cutting into our fabric, we just need to decide the fabric placement in our quilt. If you are making a rainbow-y or scrappy quilt, you have less freedom (for a rainbow quilt) or more freedom (for a scrap quilt) in deciding where your fabrics will go, but I think you will find some of these guidelines helpful.

We will have to deal with placement twice - once when we place fabrics into the quilt block and then again when we arrange the blocks for the quilt top. Hopefully this will help you with both steps.
There are two mockups here - they both use the same fabrics, but with some of the fabrics shuffled around a bit. I'm going to walk you through what I think works or doesn't work about each one.
For reference: the fabrics are all Pure Solids and the colors are Pacific (background fabric), Tile Blue, Zambia Stone, Mediterranean, Jade Cream, Mirage Blue, Tender Green, Honeydew, Heart of the Ocean, Spruce, Parisian Blue, Swimming Pool, Denim Blue, Ocean Fog, Tranquil Waters, Mystic Grey, Warm Wave, and Ash.
Quilt 1
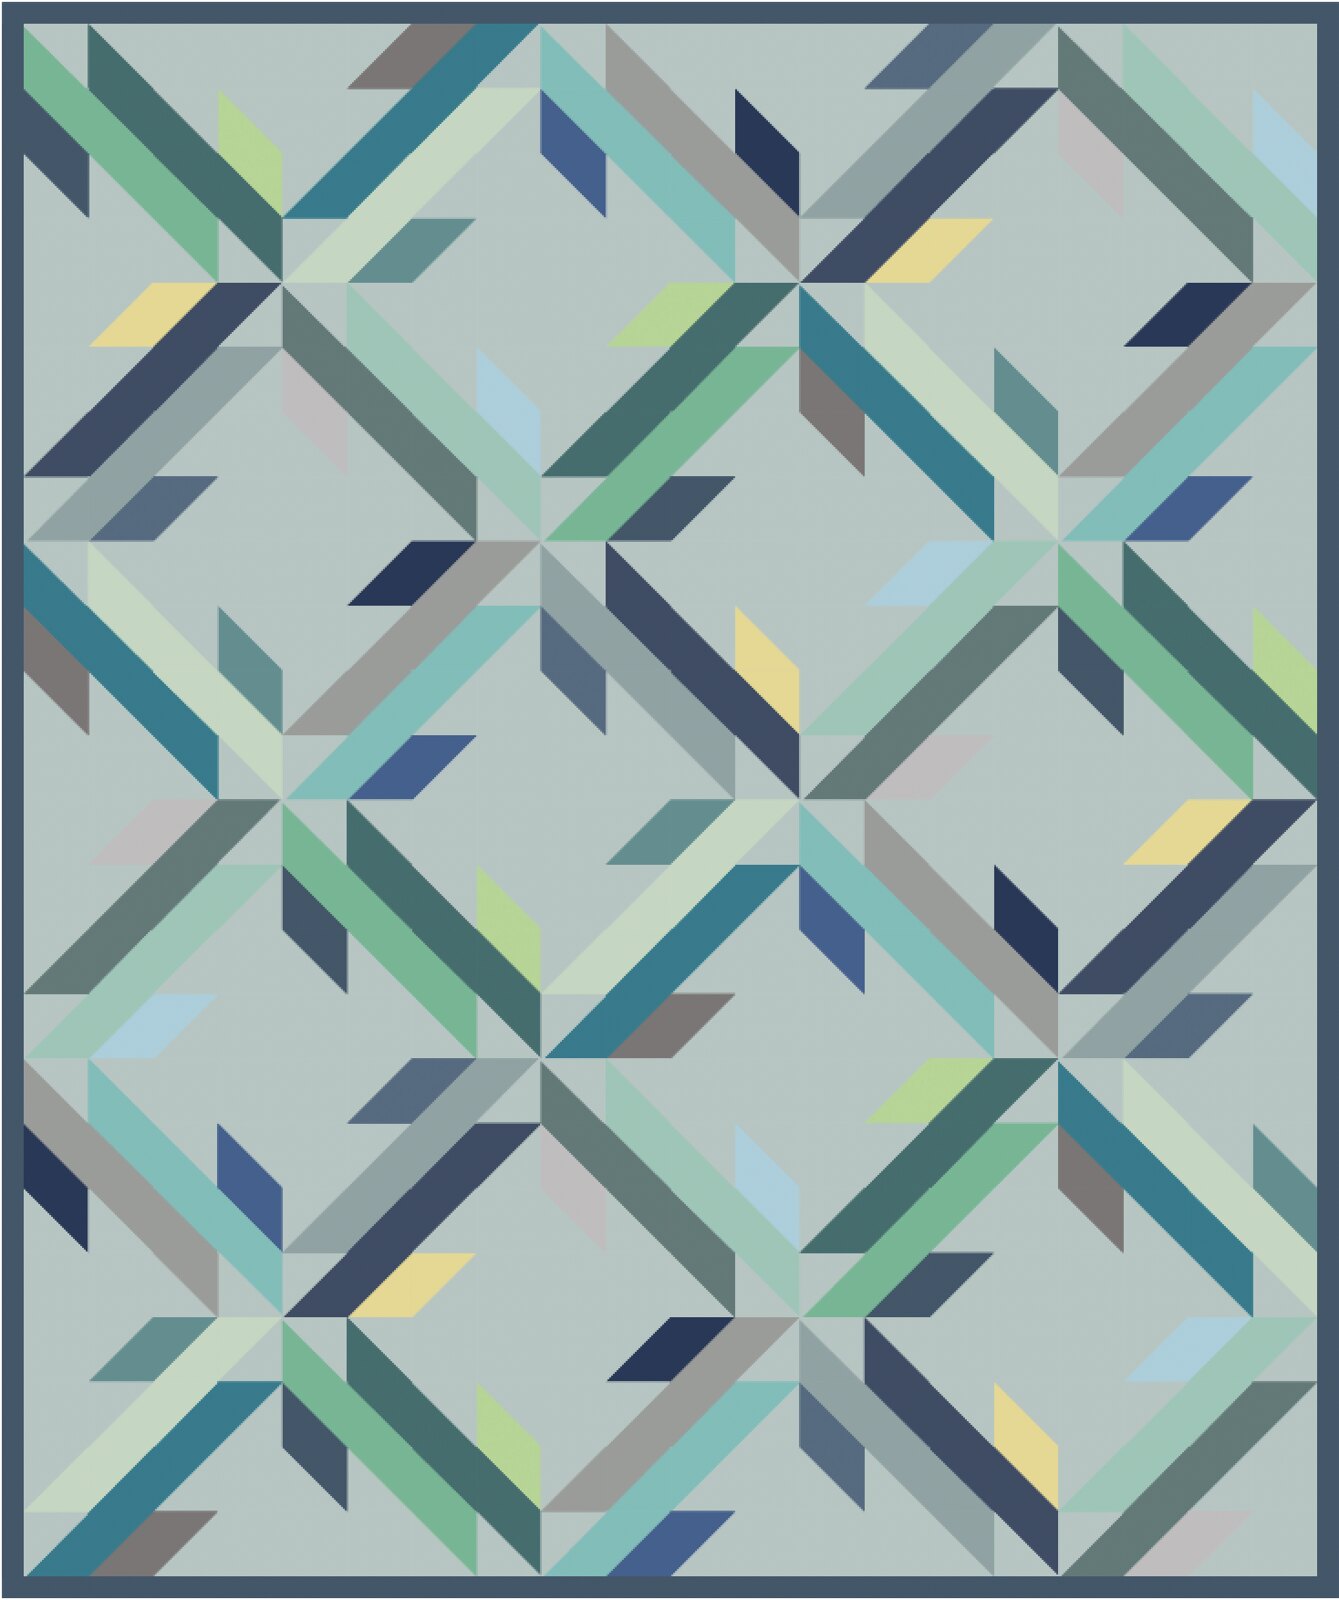
This is my preference over the two options. Each block has four fabrics and for each block, there is a mix of color and value. There aren't a bunch of darker valued fabrics next to darker valued fabrics. Even though a block may have two different shades of green, the shades and values are distinct enough that they don't blend together. The yellow-y greens are used for the smaller HSTs so they are more of an accent color to the quilt.
Quilt 2

Notice in this quilt that some of the darker fabrics are clumped together. This is visually distracting and draws your eyes toward those blocks. Also, the yellow-y greens are used more prominently in this quilt and I think it makes them look a little out of place.
Things to do to help with your fabric layout:
- Take a black and white photo of your fabrics to see how the values are distributed.
- Before you even start cutting, group fabrics A, B, C, and D together so that you are ready to get to work when it is time to start cutting.
- Use your design wall or floor to lay out your blocks before sewing your quilt top together to make sure that you are happy with the layout. Sometimes it is hard to notice the most obvious issues!

No comments
Unfortunately I have had to turn off commenting due to an overwhelming number of spam posts. If you have any questions, please contact me using the contact form at the top of the page or comment on an Instagram post.
Note: Only a member of this blog may post a comment.