Raise your hand if you dread piecing your backing fabric! Ha ha, me too. You may be using extra wide backing - lucky you! More and more fabric companies are offering 108" backing fabrics in fun prints and I LOVE them (check out all of these great options!).
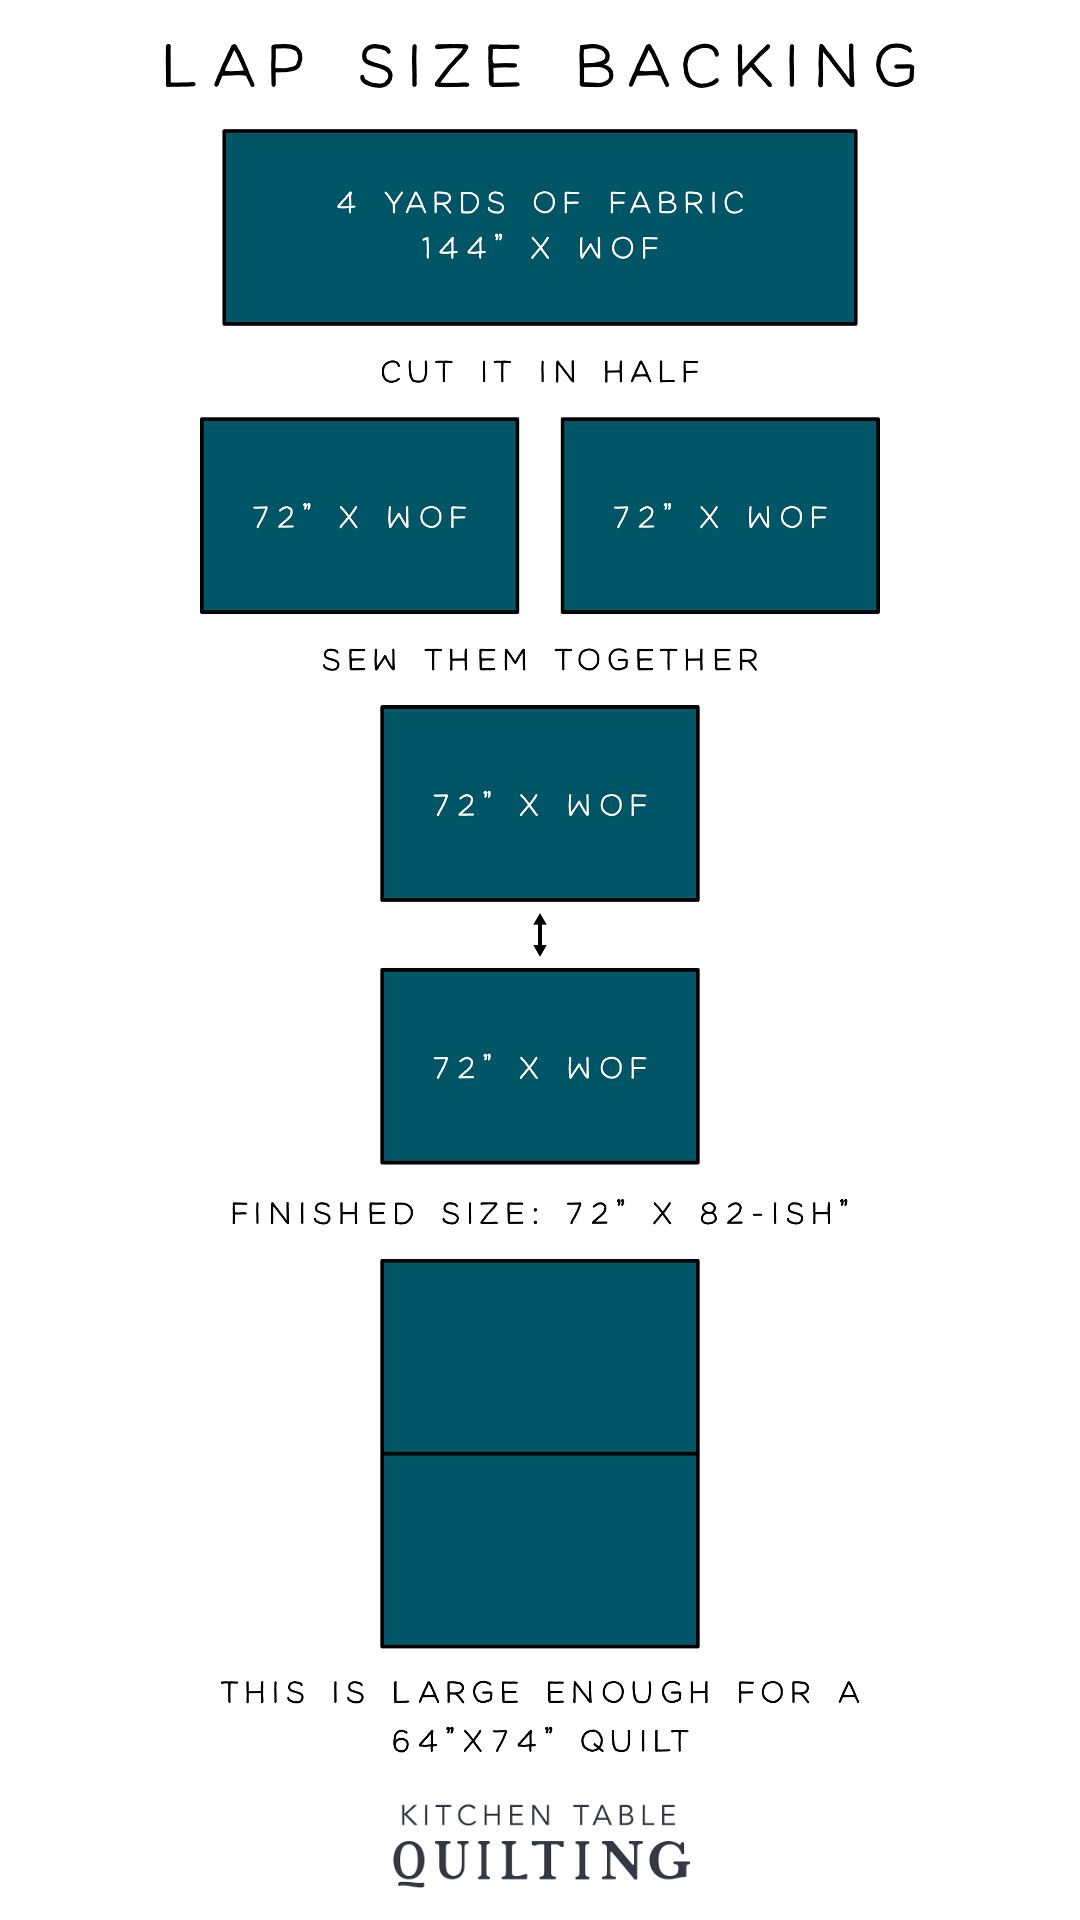
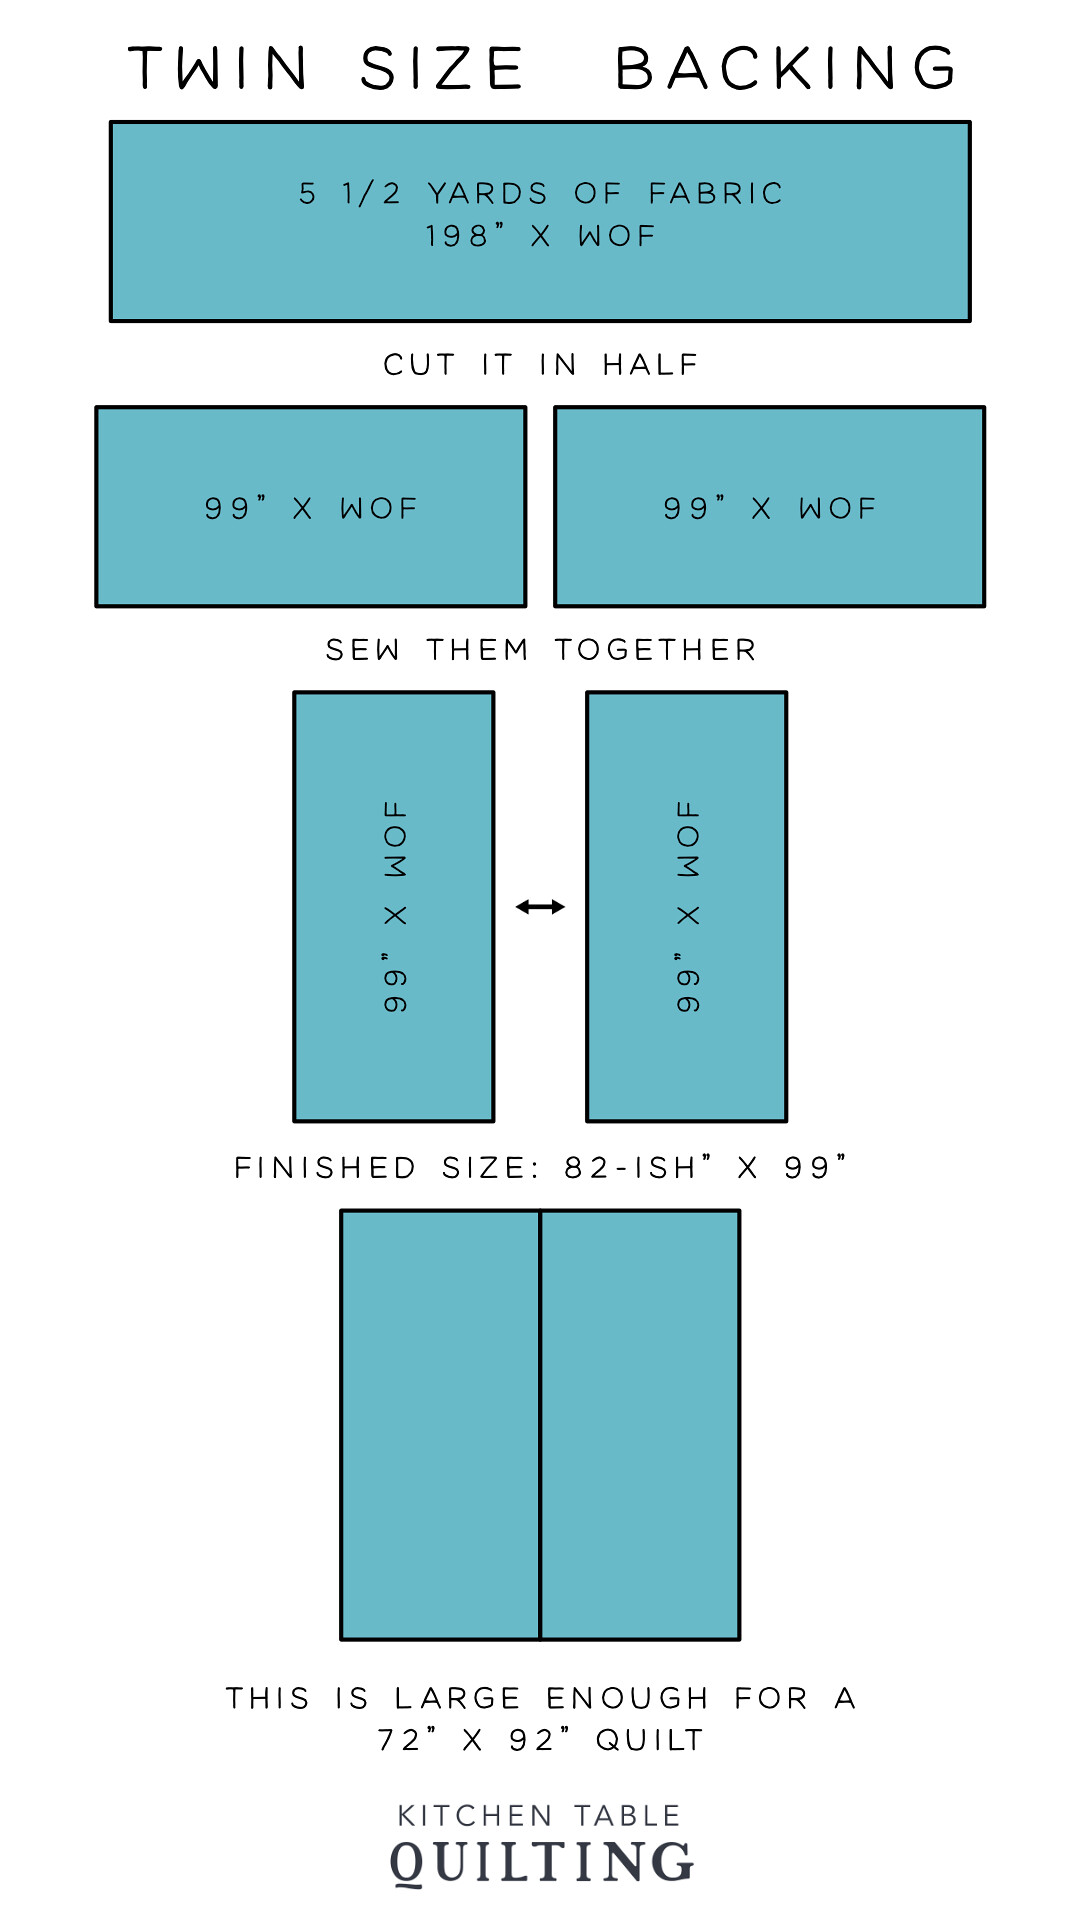
But I generally piece my backing from yardage - here is how I do it. There is an illustration below for each quilt size - the sizes listed are for the Violet Quilt Pattern, but these could be generalized for other quilt sizes that are similarly sized.
One quick note: I always use a 1/2" seam allowance when piecing the backing fabric for a quilt. This isn't required, but think about it like this: when you make a quilt top, there are lots of seams. When you push and pull and yank on a quilt (or your kids do), all of the seams share the pressure that is put on the quilt top. The backing fabric likely only has one seam so it will be extra stressed. Having a little extra seam allowance helps ensure that there aren't issues with the integrity of the seam.
Small Baby Size
These are (officially, by the quilt police) just quilts that are 34-36" wide or smaller. If you are skipping the borders on your baby size quilt, that will apply to you.
Since I am wild and crazy like that, I usually use this method if my quilt is 40" or smaller AND my backing fabric is 44" wide (sometimes it is 42" and that usually isn't enough). I leave the selvage on so I have something to tape the backing fabric to the floor with, and am very careful about lining things up when basting.
If you are going to send your quilt to a long arm quilter, you need at least 4" of extra fabric on each side of the quilt so keep that in mind.
Baby Size
Since this quilt is 40" wide, it would be a very tight squeeze to use the WOF cut for the backing of this quilt - proceed with that method at your own risk.
The diagram below shows how to cut and piece your backing fabric for a baby size quilt that is 36" or wider.

Lap Size
Since I mostly make lap size quilts, this is the method I almost always use for making backing fabric. This will work for most lap size quilts (unless they are unusually long, like more than 80").

Twin Size
When I was making this diagram, I realized that the 5 1/4 yards listed in the pattern might be a little tight for this quilt. I sent out a revised version of the PDF pattern increasing this to 5 1/2 yards - that is what I am showing here in the diagram.
Tomorrow we will talk about basting - lots of people's least favorite step! I am on a mission to get people to start finding some joy in quilt basting so I hope we can try to have a little bit of fun with it.


This is very helpful. Thanks for posting the information. I pieced my Violet quilt back with stash fabric, but this is good information to have in the future.
ReplyDeleteI think it's a topic that we don't address very often and it can be confusing, I hope it will be useful for you!
DeleteGreat tutorial!
ReplyDeleteHey Erica, just thought I'd share how we used to do it back in the olden days! When I first learned to quilt, back in the '80's we would cut the 4 yard piece in half like you did but then we took it one step further. We cut one of the pieces down the fold and added each smaller piece to the sides of the larger piece. That was to spread the tension out over 2 seams plus it removed the seam from the center and put it on the sides.
ReplyDeleteThat is a great tip, I had never considered that but it would really help with the tension on that seam. Thank you for sharing!
Delete