


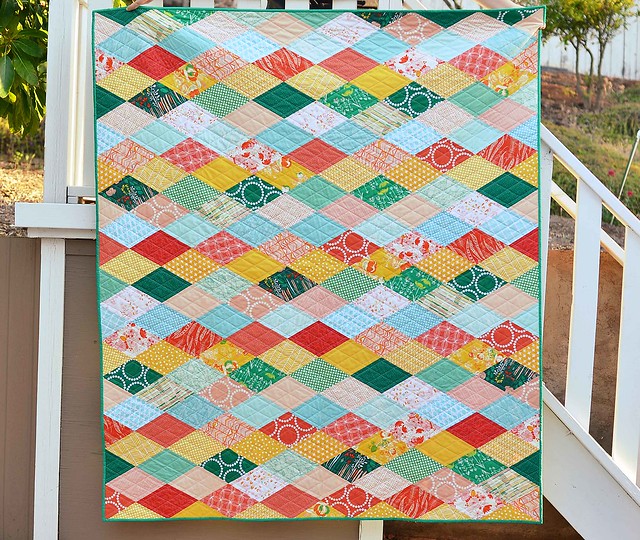
Cut the diamonds. You will need 217 total diamonds. For my quilt I used 5 different colors: 45 green, 45 peach, 37 blue, 46 orange, and 44 yellow. Some rows need 8 diamonds and some need 7 so depending on your layout you may need a couple more or less than that number.
To cut the diamonds cut a strip of fabric 5" x WOF, leaving the fabric folded. I used a fat quarter here but you could also use a wider cut.
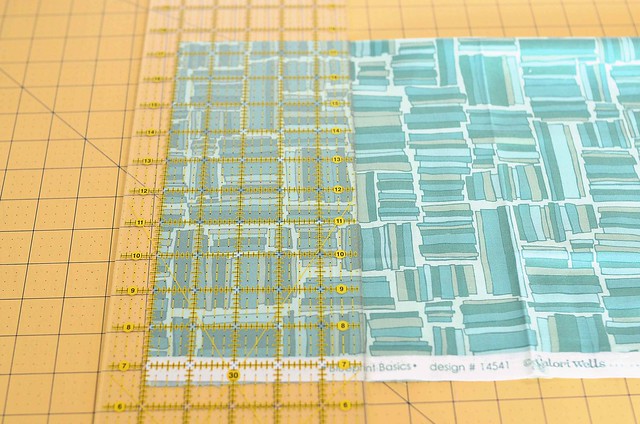
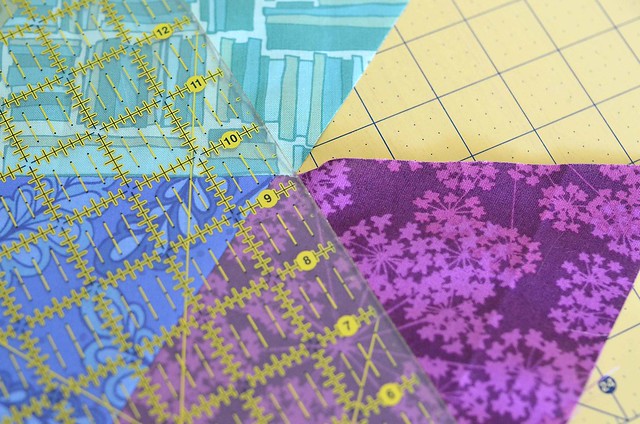
Now turn the fabric sideways and line up the 60 degree mark on your ruler with the bottom of the fabric and trim off the edge.
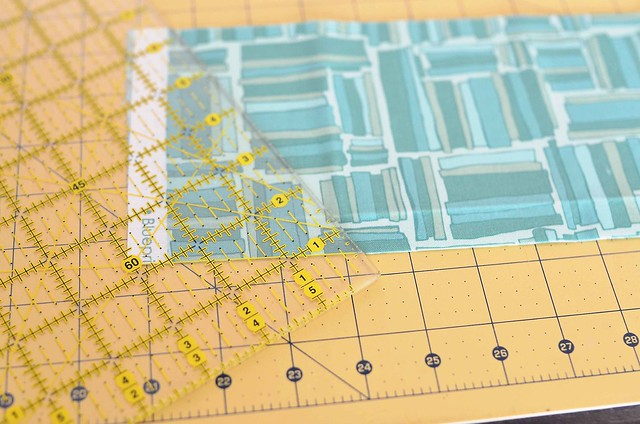
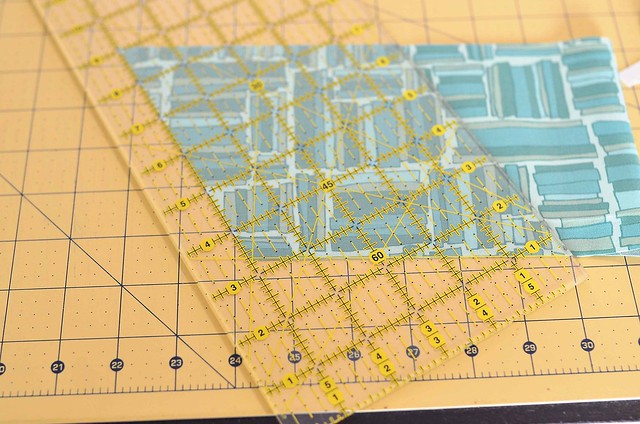
If you are cutting from a fat quarter you can get 2 diamonds per strip and if you are using the full width of the fabric you can get 4 diamonds. Keep cutting until you have the desired number of diamonds.
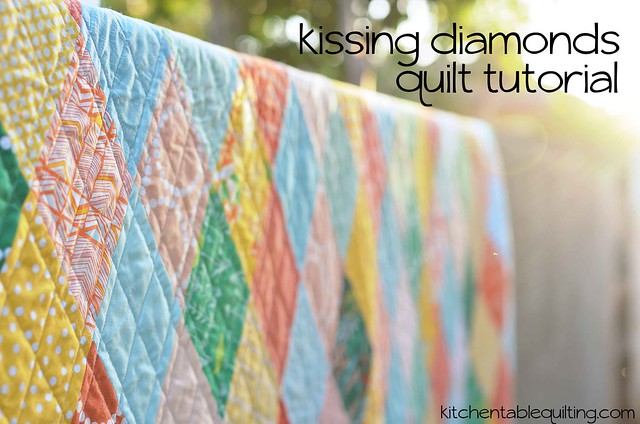
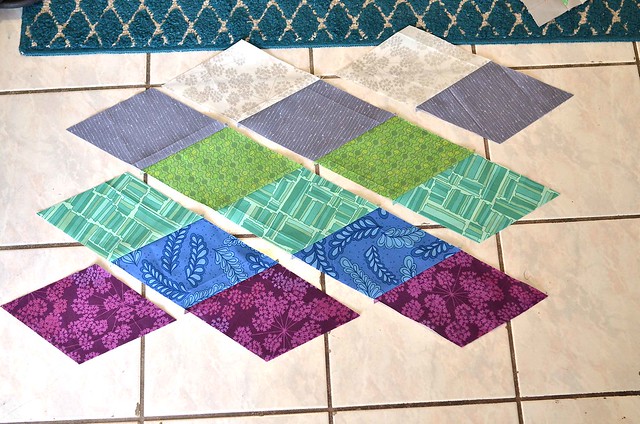
Once you have them cut, choose a layout for your quilt. I am going to make a much smaller version (using Valori Wells Blueprint Basics) to illustrate.
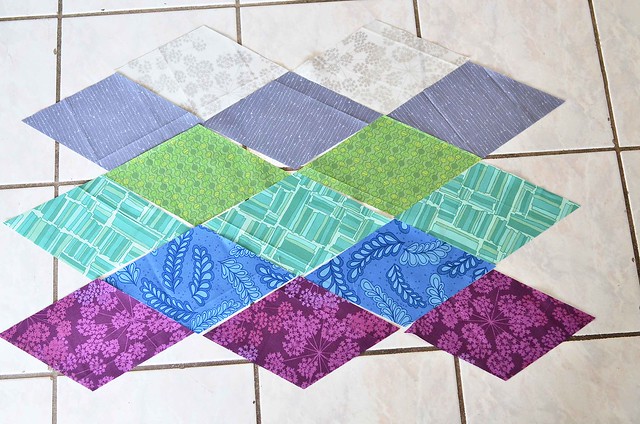
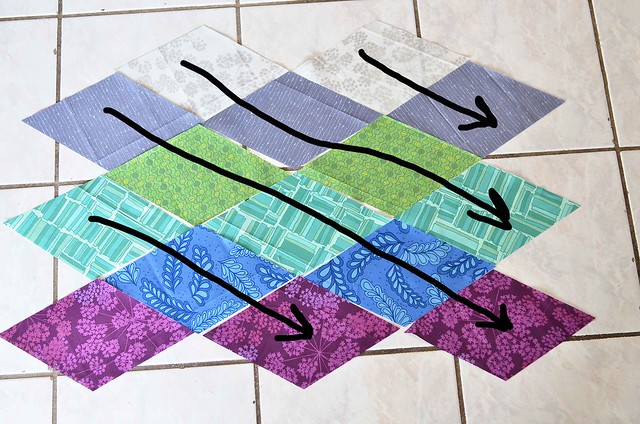
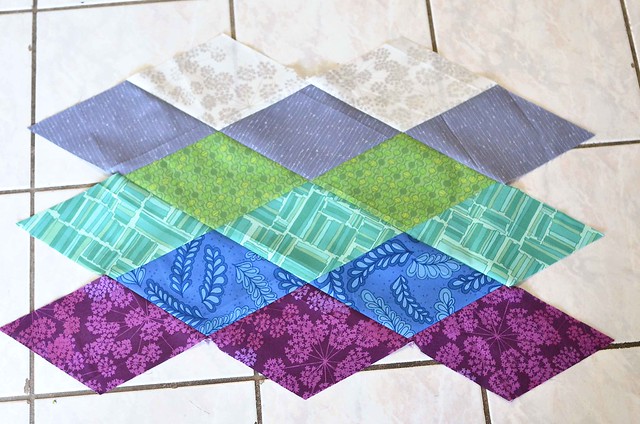
We are going to piece them together into diagonal rows like in the following photo. Forgive my crudely drawn arrows!
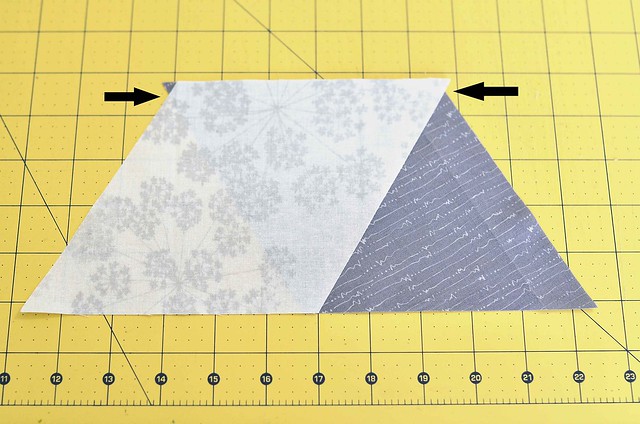
To piece together the diamonds take two of the diamonds from a diagonal row.
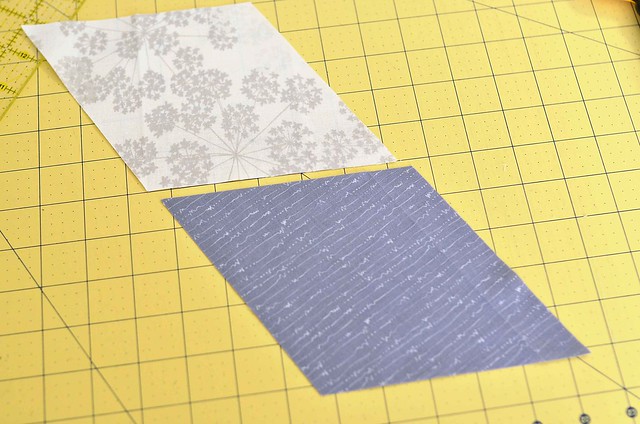
And fold the top diamond down onto the bottom diamond so they are right sides together. Instead of lining up the corners like you do with squares, you want the edges of the diamonds to cross 1/4" from the top. If it helps you can measure 1/4" down to make sure you are getting it right, but after you have done a few you should just be able to eyeball it. Be careful not to stretch the fabric. I like to use a pin at each edge and 2 in the middle just to be safe.
Press your seams open. Now repeat until you have completed the row. You can clip the little dog ears if you prefer to, but I left mine and didn't feel like it added much bulk at all.
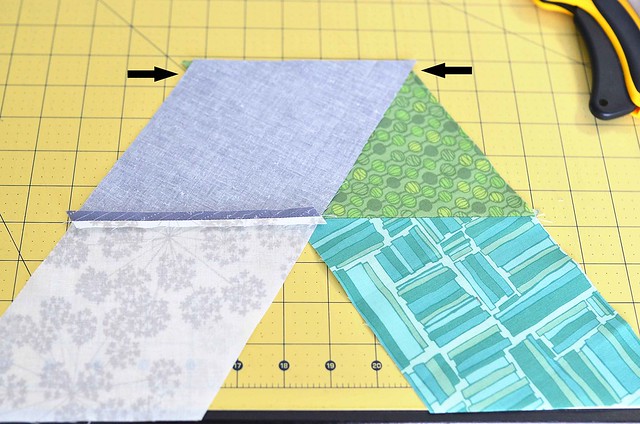
Once you have completed the rows they should look something like this (but of course bigger).
Piecing together the rows is slightly trickier, but still not that hard, because you can't see where you are lining up the seams. Elizabeth Hartman recently did a really great tutorial about piecing diamonds if you want some additional help. You still want the seams to cross 1/4" from the top but you just have to feel around for where they cross. I would definitely recommend pinning at each seam intersection; the fabric here can stretch and we don't want that to happen!

Piece the rows until you have a finished quilt top.
Now you are going to trim the edges. Just line your ruler up 1/4" to the right of where the diamonds meet on the end of your quilt. I'm not sure if that makes sense so hopefully this photo will help.
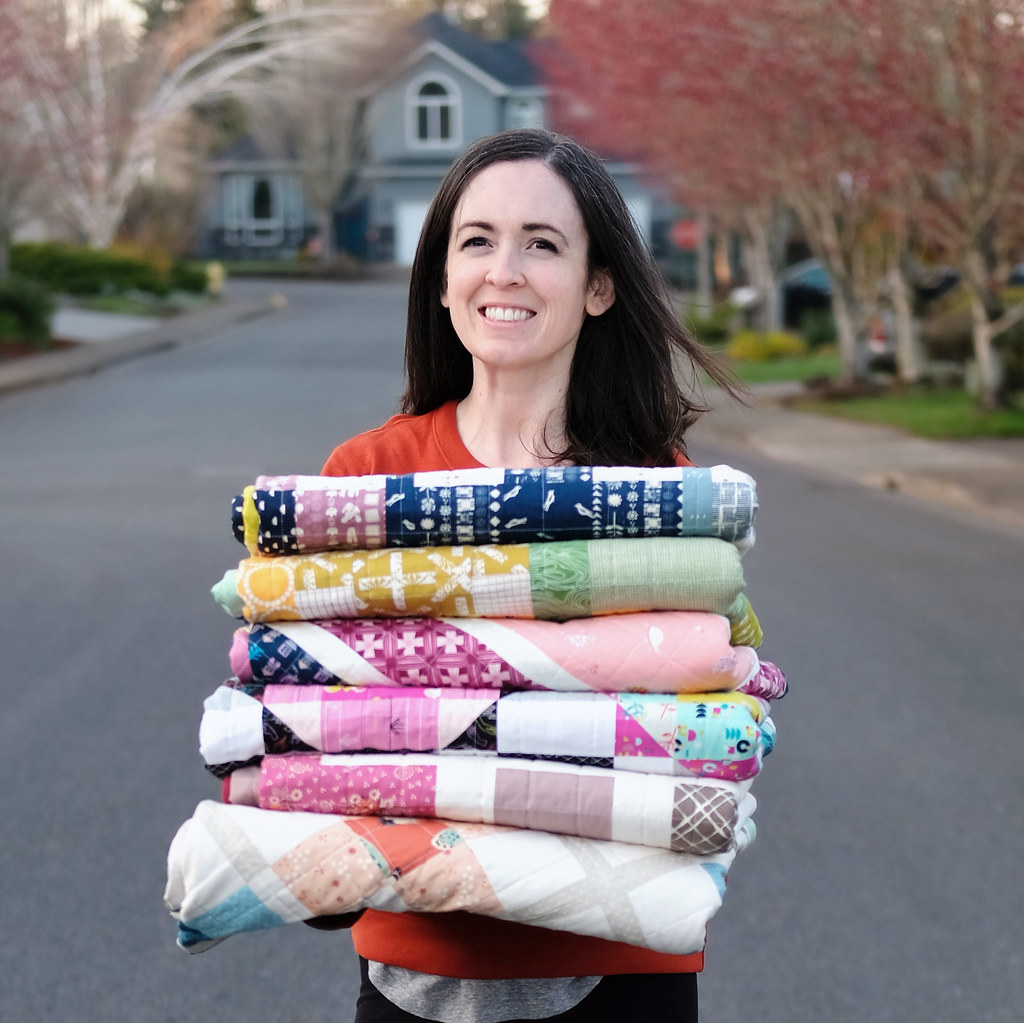
And you have a finished quilt top!

I hope that is helpful for those of you that requested a tutorial. Please let me know if you have any questions and I will do my best to answer them!

I want to make this sooooo badly! Thanks for the tutorial, I love your finished quilt!
ReplyDeletewww.sewcraftychick.blogspot.com
So so so pretty! The fabrics are just perfect for this.
ReplyDeleteBrilliant, thank you. I was just on holiday in America and bought a diamond template to help make one of these! I will still cut strips, but then use the template.
ReplyDeleteHi Erica! Your quilt is so beautiful and this tutorial very helpful! x Teje
ReplyDeleteYour quilt is beautiful, the fabrics are so visually striking, I really like the deep green. Thank you for the tutorial, you did a great job. The directions are very clear and easy to follow, great pics. Looks like a challenging and fun project.
ReplyDeleteThank you for the tutorial. You did a great job. Your quilt and the fabrics are sooo nice!
ReplyDeleteThanks so much for going to the trouble of making us a tutorial. I have been wanting to make a diamond quilt and these instructions are just what I needed. All I need now is a little courage to tackle the bias
ReplyDeleteedges !
Thanks for the tutorial - and I'm glad I don't have to buy another ruler for this one! Can't wait to try this one!
ReplyDeleteLinda T
Thanks so much for the tutorial. Especially the cutting part. I just recently did my first triangle quilt with a quilt-along and this is very similar but I'd never have thought of it without your great instructions/pictures! Thanks for taking the time to do a tutorial!
ReplyDeleteThanks so much for sharing your tips and tuto.Your quilt and quilting is just stunning!!
ReplyDeleteThis is such a pretty quilt! Great colors and fabrics. Thanks for the tutorial.
ReplyDeleteNice! Thanks for sharing Erica.
ReplyDeleteawesome tutorial! you made it seem a lot less scary than I imagined LOL!
ReplyDeleteThanks for the tutorial! I admired your quilt when you posted and am so glad you posted the tutorial! I've bookmarked it and it's now on my long list of quilts I want to make!
ReplyDeleteThank you for sharing! I would love to try this. Do you think I could do the same sort of thing with a 45 degree diamond shaped ruler? My daughter gave me one as a gift and I'm not quite sure what I can do with it.
ReplyDeleteYour quilt is beautiful, and the tutorial is really clear. Thanks for sharing. I think I might have to give this one a try.
ReplyDeletefantastic, thanks for sharing this tutorial. Your quilt is beautiful.
ReplyDeleteYou've taken what look like a difficult pattern and made a very easy to understand explanation. Thanks so much for doing this. You are very talented.
ReplyDeleteGreat tutorial. Thank you. Can't wait to make my first diamond quilt.
ReplyDeleteHappy quilting.
Fiona. Xx
Great tutorial. Thank you. Can't wait to make my first diamond quilt.
ReplyDeleteHappy quilting.
Fiona. Xx
I noticed that you said to press the seams open. I thought that you always press the seams to one side when piecing a quilt.
ReplyDeleteThis comment has been removed by a blog administrator.
ReplyDeleteLove your tutorial! Thanks so much for making it so simple. I was planning to buy a quilt pattern for this but can now avoid the cost thanks to your generosity. I'll be making this quilt soon and will encourage my quilting friends to go to your website for the great patterns you provide. Thanks again! God bless, Linda
ReplyDeleteThank you for great tutorial. When putting the rows together, I was wanting to know if there are any tricks to getting the intersections perfect on the first try.
ReplyDeleteI don't think there is really a trick other than maybe using a ruler to measure 1/4" down and then making sure your seams cross right at the 1/4" mark. I would recommend trying a couple at first to see how they turn out before you pin all of the blocks.
DeleteWhat is the finished size of his quilt
ReplyDeleteThis comment has been removed by the author.
ReplyDeleteI would like to say that this blog really convinced me to do it! Thanks, very good post. Diamond color
ReplyDeleteThanks for taking the time to discuss this, I feel strongly about it and love learning more on this topic. If possible, as you gain expertise, would you mind updating your blog with extra information? It is extremely helpful for me. freemspclub
ReplyDeleteWow! Such an amazing and helpful post this is. I really really love it. It's so good and so awesome. I am just amazed. I hope that you continue to do your work like this in the future also. wholesale loose diamonds dallas
ReplyDeleteI read that Post and got it fine and informative. Scottsdale diamonds
ReplyDeleteSo helpful and simply put! Thank you!
ReplyDelete